Overview
The tasks section displays action items for each patient based on the patient’s survey responses. If your role involves processing the daily patient tasks within medSage, then this is the area you will want to begin to work with when you log into your medSage application. Along the left-hand side are several lists to help organize your workflow.
Reorders: All patient tasks that contain only a reorder (or a reorder with archived notifications) display under this list.
Reorders w/ notifications: All patient tasks that include both a reorder request as well as some type of follow-up notification reported by the patient. These tasks can be filtered by type (report, general or clinical) using the dropdown above the list. ‘General Notifications’ are mostly insurance and address changes that can potentially be resolved quickly. ‘Report Notifications’ include the compliance report that is automatically generated after the patient has received a compliance call. ‘Clinical Notifications’ refer to issues such as patient non-compliance, mask or other irritation issues, or machine malfunctioning. Notifications: All patient tasks that contain only notifications display under this list. All open: All open patient tasks (reorders and notifications alike) display under this list. The three categories described above are combined in this list. Completed tasks: All reorders and notification that have been handled display under this list
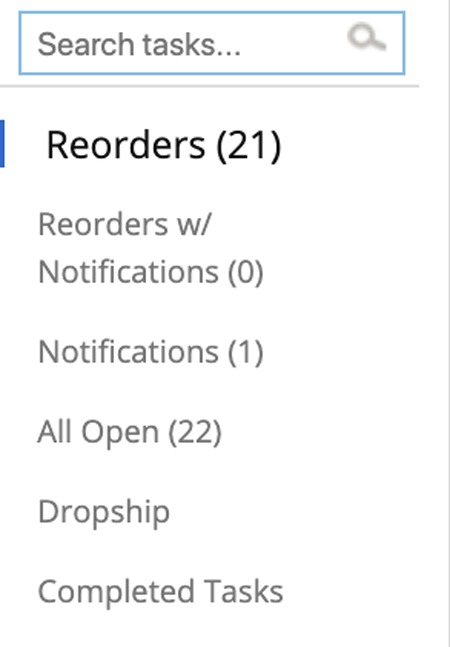
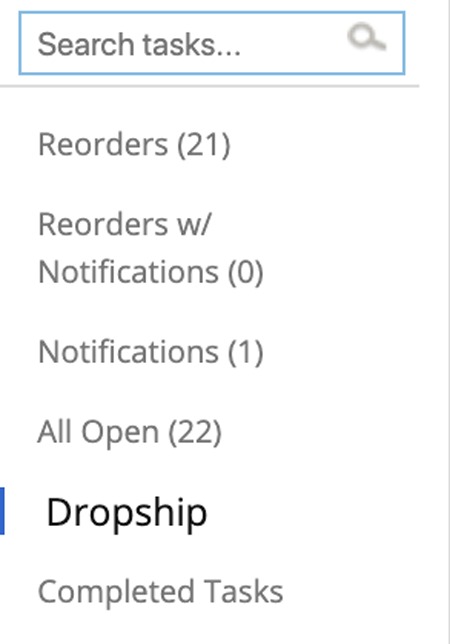
If the left-hand side list contains ‘Dropship’ as seen at left, please follow the specified ‘Dropship Tips’ described through this guide when applicable. Dropship: This list allows you to monitor the reorder request during the dropship process.
Processsing reorders
The following procedure is based on our recommendations on how to best process reorder requests; however, you should always refer to your company policies and procedures where appropriate. Reorders are typically generated from supply surveys where patients indicate they would like to order new supplies. Application users can also create new reorder requests manually within the ‘Patients’ section. These (manually created) reorders will also appear in the ‘Task’ section. When beginning to work with patient tasks, it is most efficient to work on reorders that can be shipped quickly without extra follow-up work. Once these types of reorders are processed, those that will require more patient follow-up should be reviewed. Therefore, we recommend prioritizing the organization of your workflow as listed: 1. ‘Pure’ reorders: Review the tasks with reorders under the “Reorders” list. These have no associated notifications or all archived notifications. 2. Reorders with notifications: a. ‘Non-Clinical’ reorders: Review tasks under the ‘Reorders w/ Notifications’ list that are considered Non-clinical. These notifications generally are insurance and address changes that can potentially be resolved quickly.* b. ‘Clinical’ reorders: Review the reorders that have clinical notifications associated with them. These reorders generally take the most amount of time to process due to the patient reporting potential problems like non-compliance or equipment issues.* Note: It is very important for notifications to be resolved prior to ‘Approving a Reorder’. (* See ‘Processing Notifications’ in next section)
Workflow
View When you select one of the notification-related lists, all patients with notification tasks appear. Several actions can be taken on the lists: Searching: Located to the left of lists. Use the search view to enter criteria to narrow patients based on items like name and phone number. Sorting: Headings at the top of the patient list can be clicked for sorting by the selected column. View changes: Several lists have a dropdown menu located above the patient list which contains different viewing criteria, such as notification type.
Action items When you select one of the reorder-related lists, all patients with reorder tasks appear. To review an individual task, click the desired patient. The task will open displaying several details. Most clients then perform the following steps: 1. Perform internal checks. For example: 2. Edit a patient’s information if needed 3. Edit a patient’s information, if needed. 4. Approve a reorder
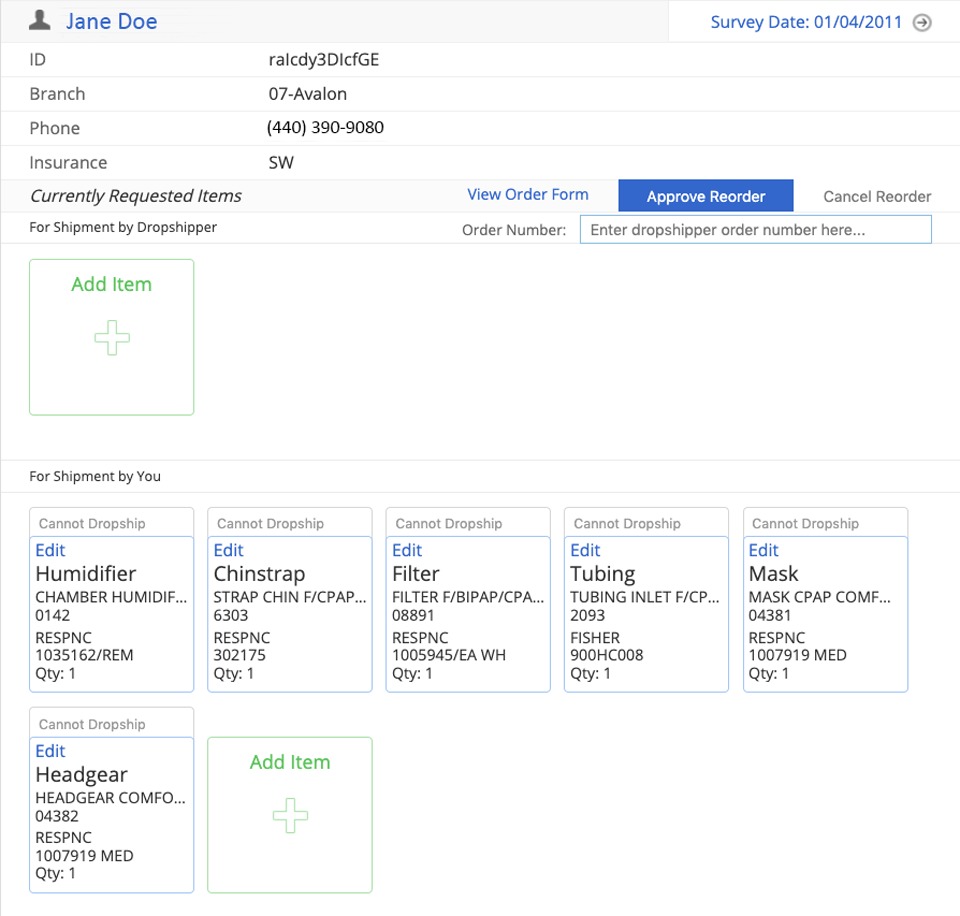
Note: To save time, if an order item(s) needs to be edited, enter this into your billing system only and medSage will reflect this change in the order history.
Processsing notifications
The following procedure is based on our recommendations on how to best process notifications; however, you should always refer to your company policies and procedures where appropriate. Notifications are typically generated from supply and compliance surveys where patients indicate they have a change to their information or a problem with their therapy. When beginning to work with patient tasks that involve notifications, it is most efficient to first work on tasks where a reorder is also associated. This is because the issue related to the notification could potentially cause significant delay in the processing of the associated reorder request. (For those companies that make compliance calls, print all compliance reports first so that you can quickly close these notifications and begin your work on others.) We recommend the following organization of your workflow: ‘General’ notifications w/ reorders – Review tasks under the ‘Reorders w/ Notifications’ list. Review reorders that have notifications associated with them that are non-clinical in nature. These notifications generally are insurance and address changes that can potentially be resolved quickly. ‘Clinical’ notifications w/ reorders – Review the reorders that have clinical notifications associated with them. These notifications may take a longer time to resolve because they are problems like non-compliance or equipment issues. This includes ‘Report’ notifications, which are compliance reports generated during the compliance period. All other notifications – Review tasks under the ‘Notifications’ list. These are all patients who have reported problems or updates. Some of these patients may potentially generate orders while resolving problems, which can be created in the patient’s record.
Workflow
View Searching: Located to the left of lists. Use the search view to enter criteria to narrow patients based on items like name and phone number Sorting: Headings at the top of the patient list can be clicked for sorting by the selected column View changes: Several lists have a dropdown menu located above the patient list which contains different viewing criteria, such as notification type.
When selecting one of the notification-related lists, all patients with notification tasks appear. Several actions can be taken on the lists:
Action items To review an individual task, click the desired patient. The patient’s task opens for review. While reviewing, you may need to update patient and order information before a task can be completed. Most clients then perform the following steps: 1. Recognize the notifications that resulted from the survey to develop a follow-up discussion. 2. Contact patient with the prepared follow-up discussion and obtain any updates from the patient. 3. If an update with the patient’s contact details occurred, edit the patient’s information in billing as well as medSage (i.e. phone number, address, preferred contact method, etc.) 4. Archive a notification
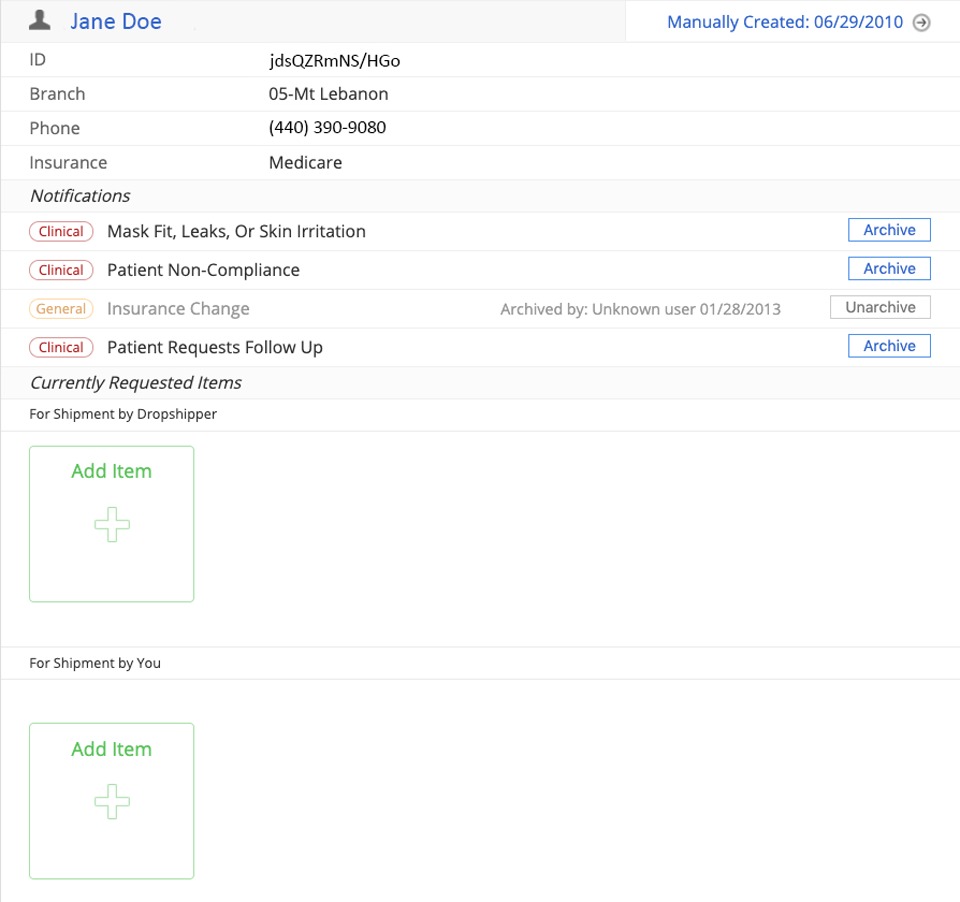
Note: To save time, if an order item(s) needs to be edited, enter this into your billing system only and medSage will reflect this change in the order history.