Home
My Philips
Home
iManual - SmartCleanPLUS
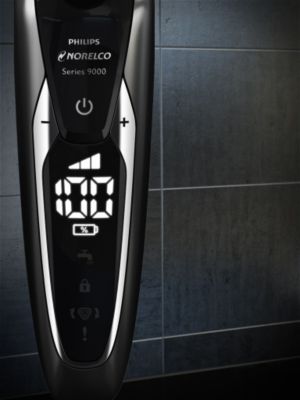
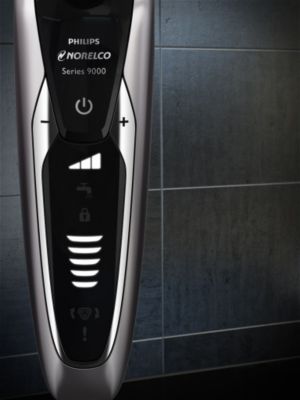
Display
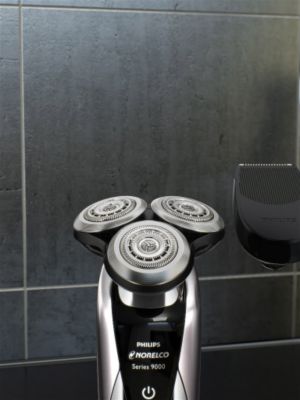
Heads
Shaver series 9000
The color of your shaver might
vary from the image shown.
PEX v1.3.4 - Manual 1.0.7
Power
Personal settings
Battery
Clean
Travel lock
Replace
Warning
Travel Lock
How to clean
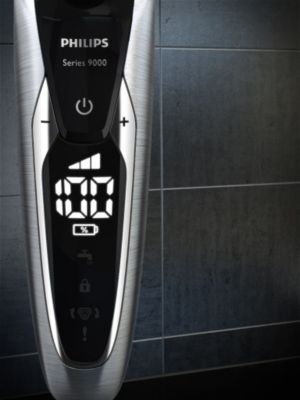
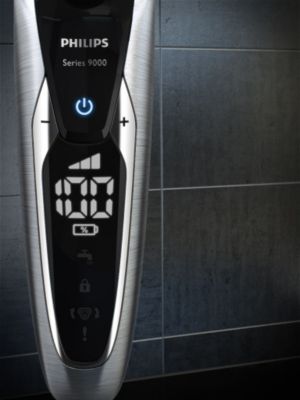
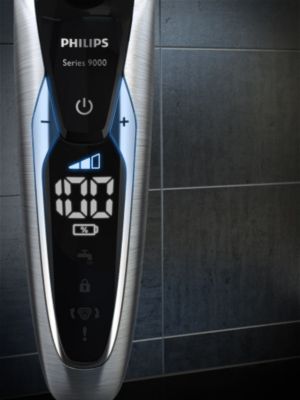
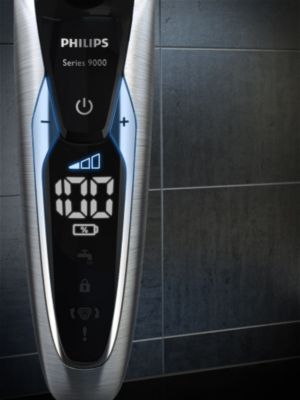
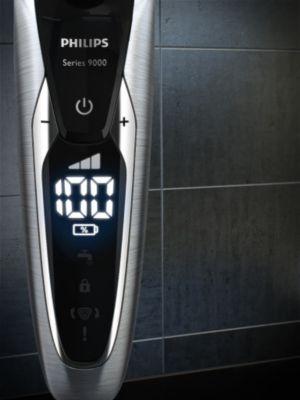
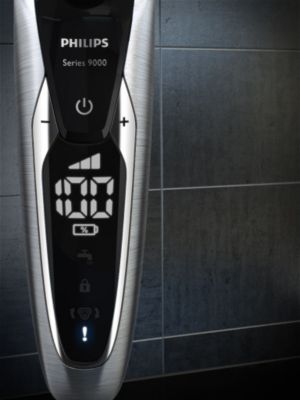
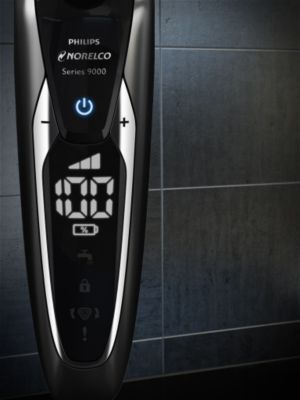
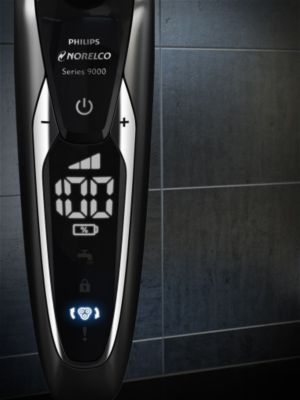
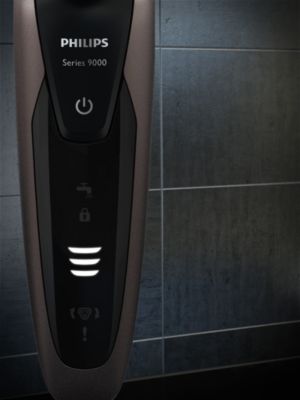
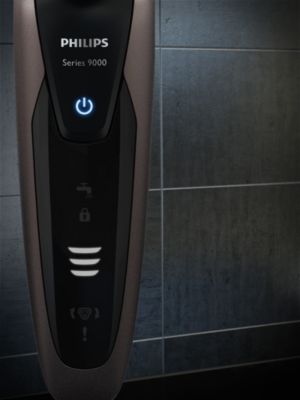
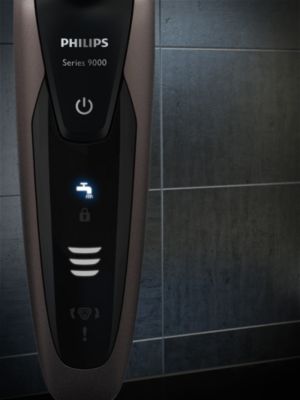
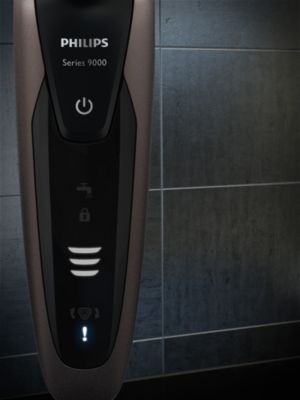
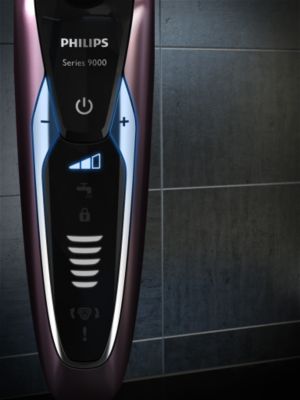
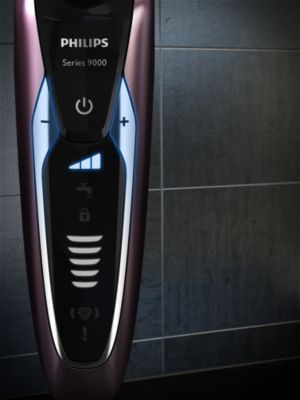
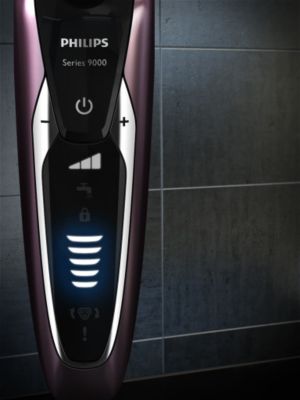
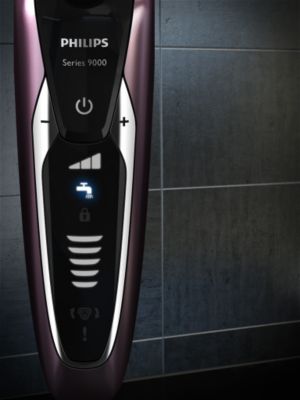
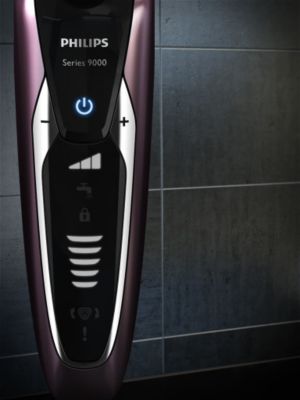
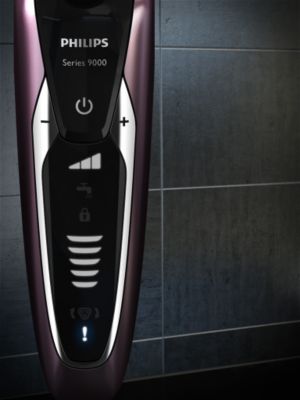
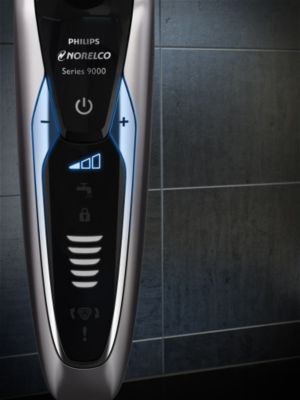
The user interface shows you the functionalities and battery percentage of your shaver.
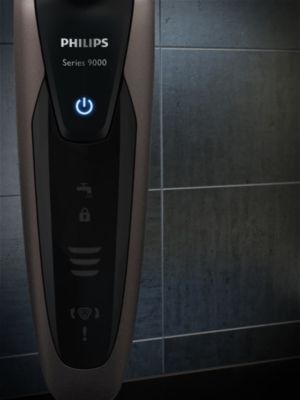
This on/off button switches your shaver on and off.
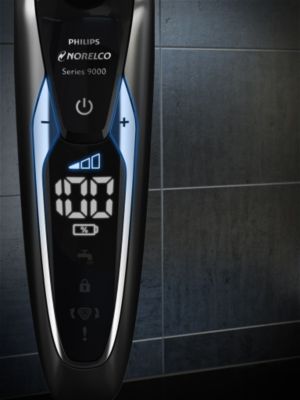
Personalize your shave between three settings. Choose the speed setting that best fits your skin and hair type:
Personal
comfort settings
Sensitive: for an even more skin-friendly shave
Normal: for a thorough shave
Fast: for a high-powered shave
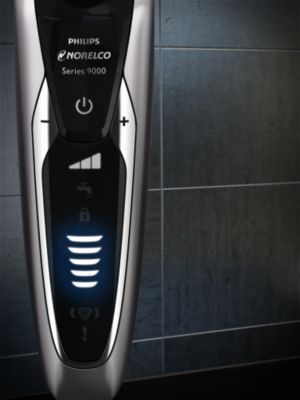
The battery charge indicator will show you the battery percentage of your shaver.
Battery level
The battery symbol blinks orange. Percentage shows 10 % and downwards.
The battery symbol blinks white, percentage from 10% and upwards.
The battery symbol lights up white continuously with a percentage of 100%
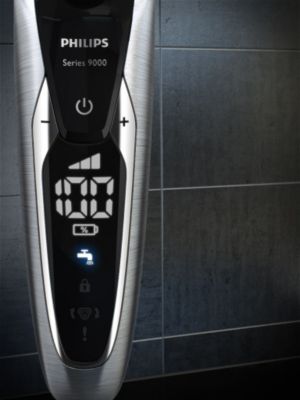
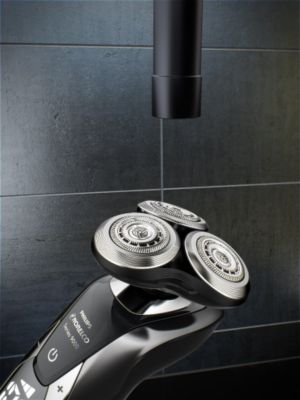
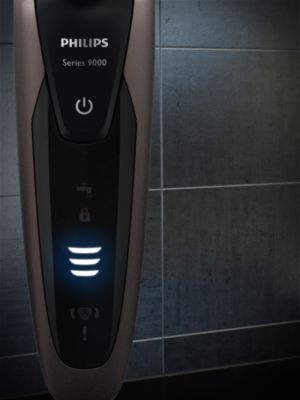
Your shaver needs cleaning. This symbol lights up after every use. Simply clean the shaver under the tap for optimal shaving performance.
Cleaning
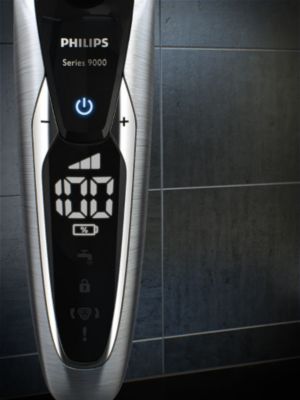
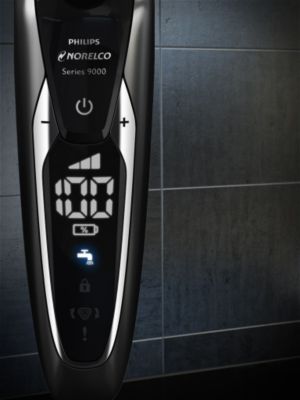
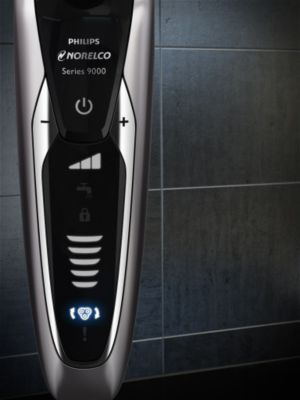
Activate/deactivate the travel lock feature by pressing and holding the on/off button for 3 seconds
Travel lock
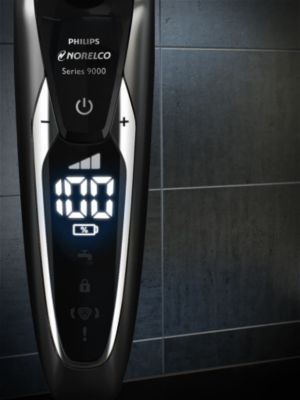
Replacing your
shaver heads to
new
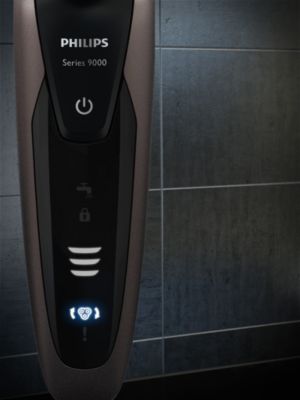
This replacement reminder lights up to indicate that you have to replace your shaving heads. Replace your shaving heads right away with original Philips SH90 shaving heads.
Warning
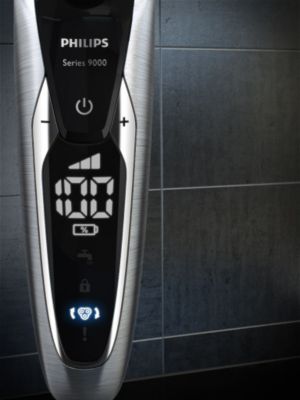
This exclamation mark lights up to indicate your shaver is overheated, or that the shaving heads are not working properly
The exclamation mark lights up orange. The replacement reminder and the cleaning reminder flash white alternately to indicate that you have to clean or replace your shaving heads.
Your appliance has overheated during charging. Remove the plug and wait for ten minutes before you continue charging.
Buy
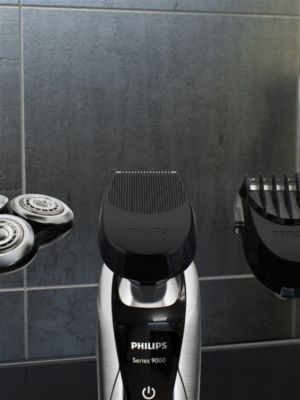
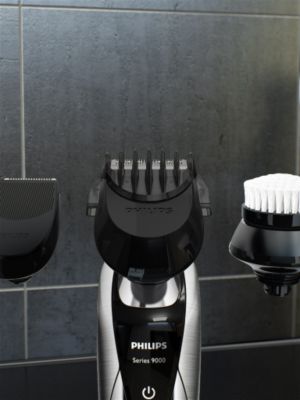
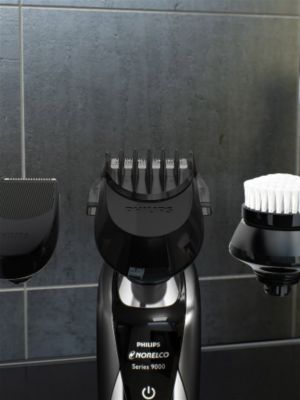
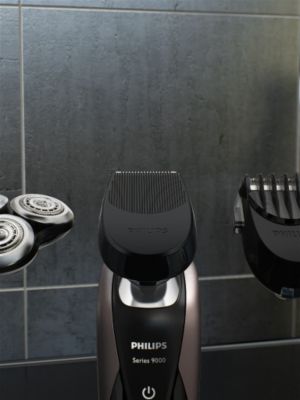
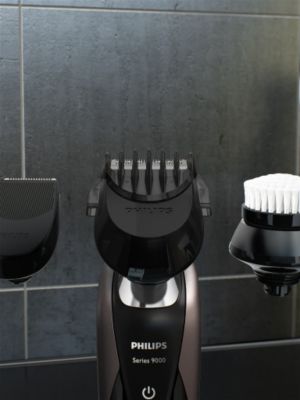
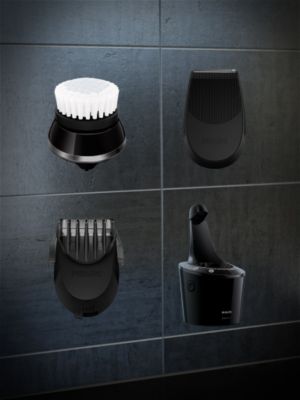
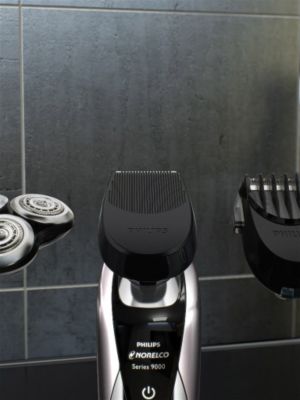
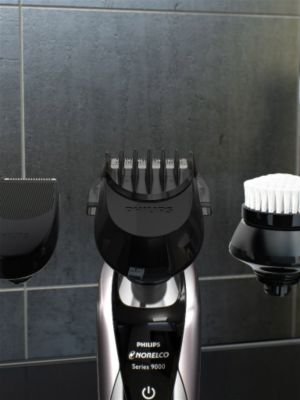
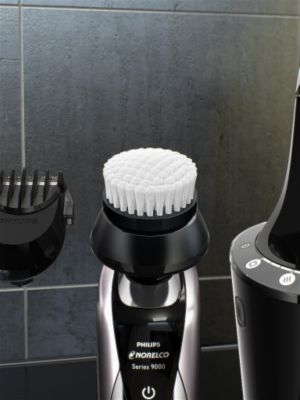
Attachment overview
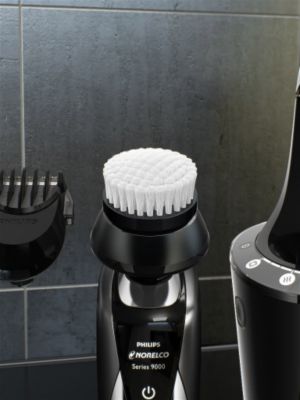
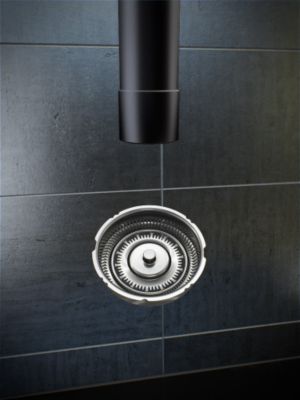
Cleansing
brush
Detail
trimmer
Beard
styler
Smart
Clean
System
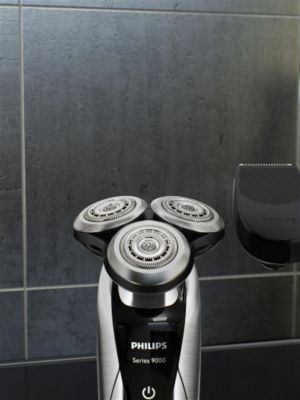
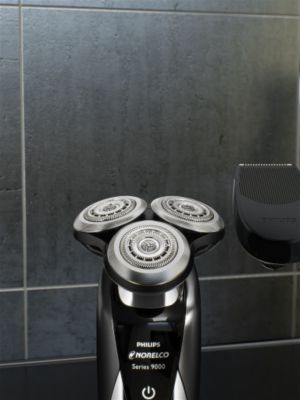
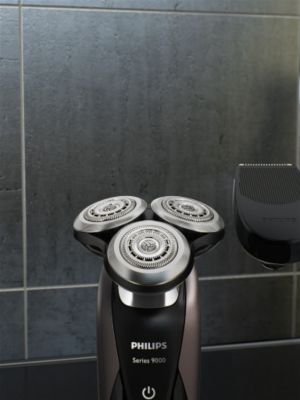
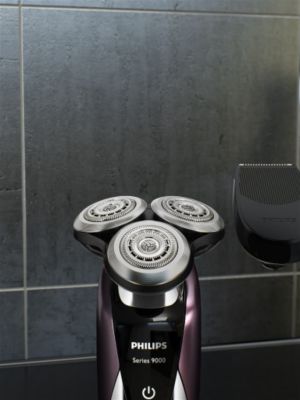
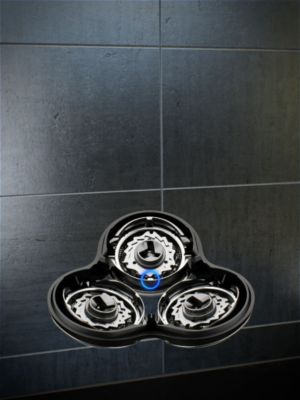
Contour detect technology
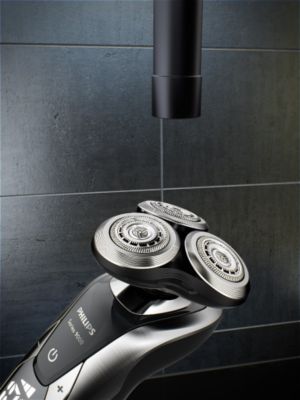
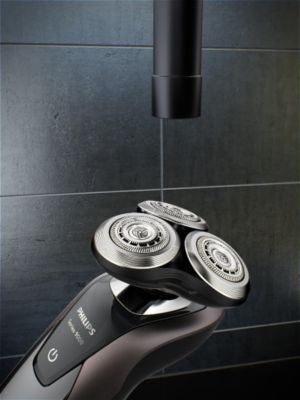
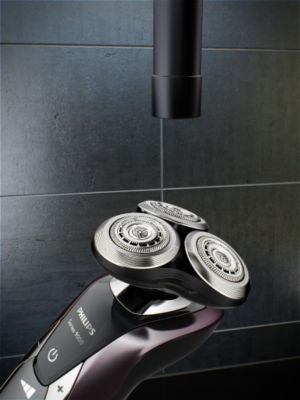
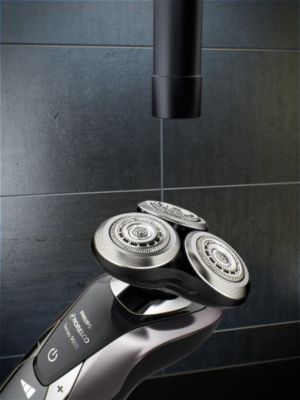
V-Track precision blades
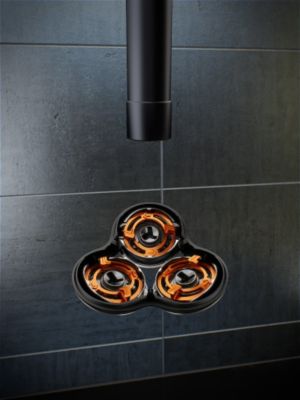
Shaving unit
The V-Track precision blades gently position each hair in the best cutting position, even flat-lying hairs and hairs of different lengths.
Please note that it is possible that your
shaver does not come with all accessories.
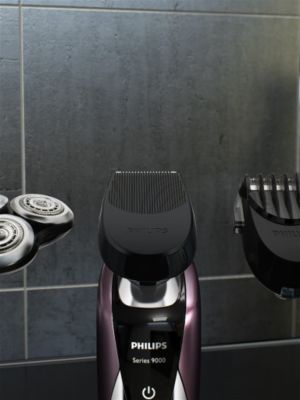
Detail trimmer
The trimmer attachment allows you to groom your sideburns and moustache.
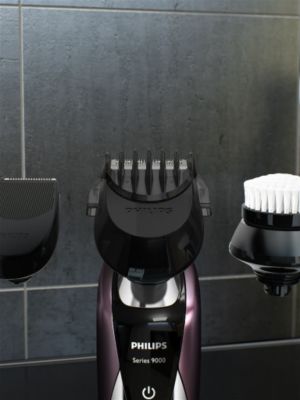
Beard styler
The skin-friendly beard styler allows you to create different facial styles: a beard length of 5mm to 0.5mm beard with comb, or to contour your beard, moustache, sideburns or neckline without comb.
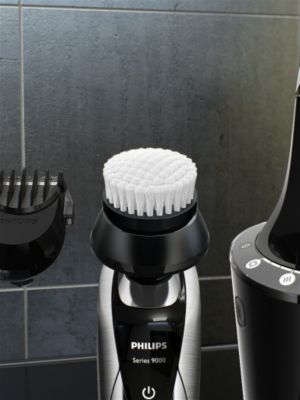
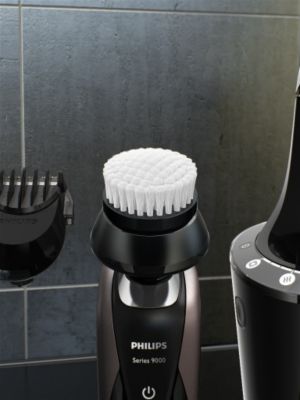
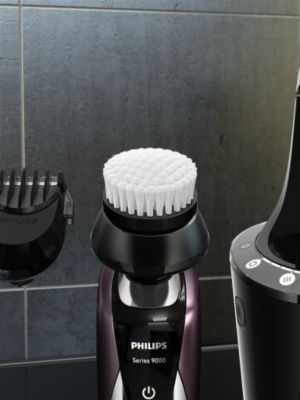
Cleansing brush
The cleansing brush attachment cleans more effectively than manual cleansing, leaving your skin clean, fresh and radiant.
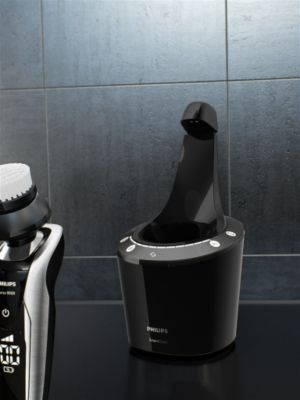
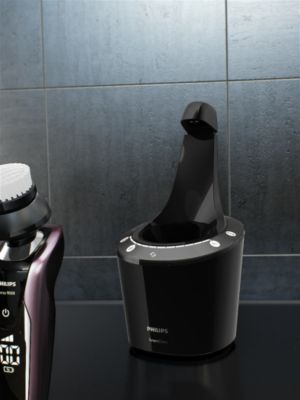
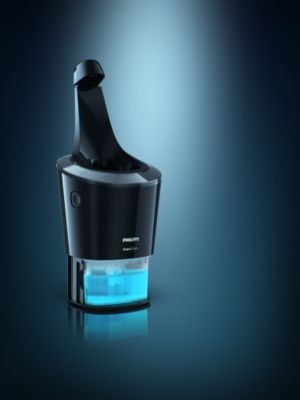
SmartClean System
At the touch of a button, the SmartClean cleans, lubricates, dries, and charges your shaver. Day in, day out, it optimises your shaver's performance.
Next step
Step 1
Rinse the shaving unit under the tap.
Step 2
Pull the top of the shaving head holder off the bottom part of the shaving unit.
Step 3
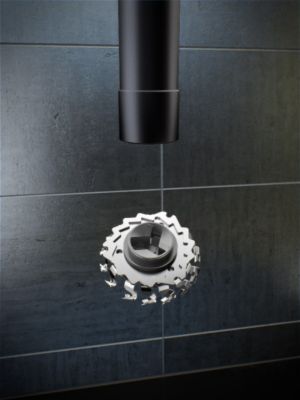
Rinse the shaving head holder under the tap.
Thorough
Step 4
Reattach the shaving head holder to the bottom part of the shaving unit.
Done
Simple
Step 4a
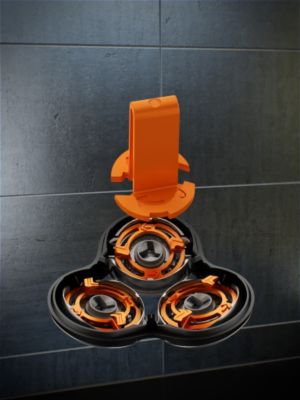
Place the retaining ring holder on the retaining ring, turn it anticlockwise and lift it off the shaving head.
Step 4b
Remove the shaving heads from the shaving head holder. Each shaving head consists of a cutter and guard. They are matching sets, so it is important to keep them together.
Step 4c
Clean the cutter under the tap.
Step 4d
Clean the guard under the tap.
Step 4e
Place the cutter back into the guard and put the shaving heads back into the shaving head holder
Step 4f
Place the retaining ring back on the shaving head.
The battery charge indicator will show you the battery capacity of your shaver.
The bottom light flashes orange.
The bottom light flashes white and then lights up white continuously. Then the second light flashes and then lights up continuously, and so on until the shaver is fully charged.
All lights of the battery charge indicator light up white continuously.
Controls
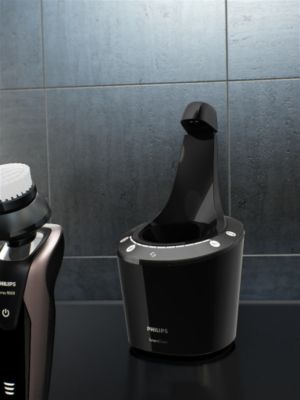
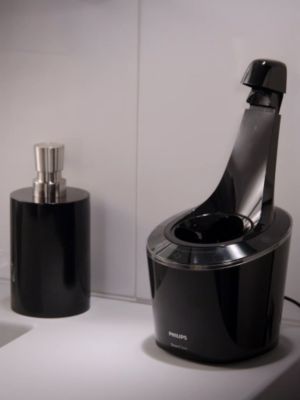
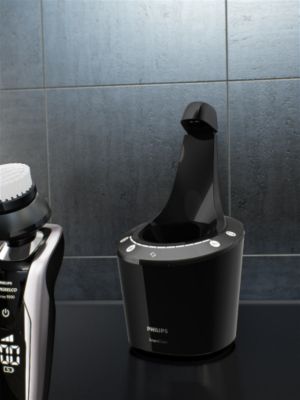
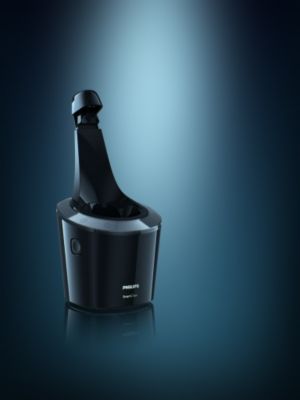
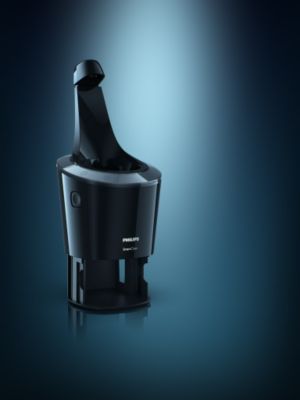
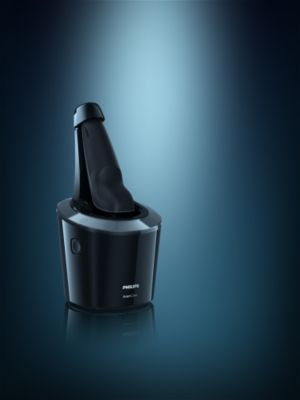
Smart Clean Station Pro
Please note that your shaver does
not come with all accessories.
The different phases of the SmartClean system will make sure you can easily clean your shaver and charge it at the same time. Check the progress bar to see the progress of the rinsing and drying phases.
Power button
Press the on/off button to activate the rinsing phase of the cleaning program.
Cleaning
Removes hair, foam and gel with its Dual Filter system. Your shaver is cleaned and lubricated. Cleaning takes about 10 minutes.
Drying
Thoroughly dries your shaver after cleaning. While drying, the symbol lights up continuously. Drying takes about 4 hours
Ready
When the cleaning program has been completed, the ready symbol lights up continuously.
Charging
Automatically charges your shaver, so it's always ready when you need it. Charging takes about 1 hour. The battery symbol lights up continuously when the shaver is fully charged.
Press the button on the side of the SmartClean system and lift the top part.
Pull the seal off the cleaning cartridge and place it in the SmartClean system.
Push the top part of the SmartClean system back down.
Press the top cap to be able to place the shaver in the holder.
Hold the shaver upside down above the holder. Make sure the front of the shaver points towards the SmartClean system.
Step 5
Press the on/off button on the SmartClean system to start the cleaning program.
Step 6
Smart Clean Station Plus
/content/B2C/en_US/marketing-catalog/pe/face-shavers/imanual/smartclean-plus-S9311_84.html
https://www.philips.co.uk/c-p/RQ111_50/smartclick-smartclick-accessory-5-length-settings
/content/B2C/en_US/marketing-catalog/pe/face-shavers/imanual/S9311_84.html