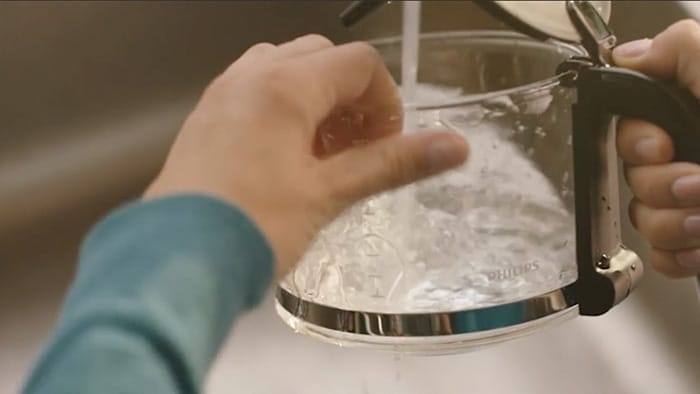
Learn how to get the most out of your Grind & Brew coffee maker
How to brew coffee
How to clean the grinder funnel
It is important to clean grinder funnel every 1-2 weeks. This prevents clogging of ground coffee in your coffee maker. You can clean the grinder funnel easily with the brush.
How to descale
It is important to descale your coffee maker to ensure perfect taste, and maximum coffee temperature. Descaling also prolongs the life of the coffee maker and prevents malfunctioning. You can use white vinegar for descaling your Grind & Brew.
Troubleshoot
- The bean grinder of my Philips Grind & Brew does not work
-
Find below tips and instructions to enable the grinder of your Philips Grind & Brew coffee maker.
1. Checking the pre-ground coffee function
If you want to use the bean grinder, check if you have not accidentally selected the pre-ground coffee function.
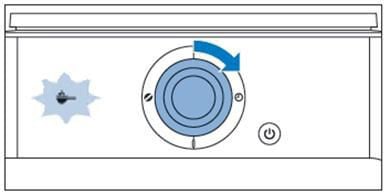
If the pre-ground symbol is shown on the display, the pre-ground coffee function is active.
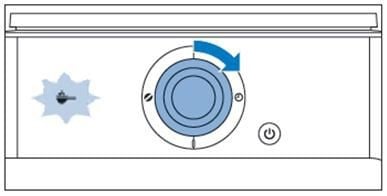
Press the strength select button and turn the knob to select the grinder function.
2. Selecting the coffee grinding function
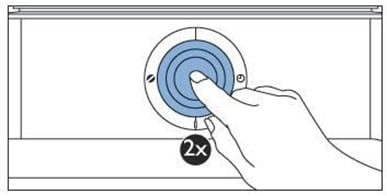
If the coffee grinding function has been selected, make sure that you push the center of the knob twice to start the grinding and brewing process.
If the above steps do not solve the problem, the grinder may be jammed. In that case, please contact the Philips Consumer Care Center
- The ground coffee does not fall in the filter basket of my Philips Grind & Brew
-
If the freshly ground coffee does not fall into the filter basket of your Philips Grind & Brew coffee maker, please see below for instruction and tips.
Cleaning the chute
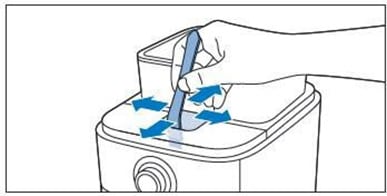
Please clean the coffee bean chute with the cleaning brush. We advise you to clean the coffee bean chute every 1 to 2 weeks, depending on the frequency of use.
Checking the lid
To prevent freshly ground coffee from clogging up the bean chute, make sure the lid of the coffee bean chute is always properly closed and clean the bean chute frequently.
- My Philips coffee maker shuts off automatically
-
By default, the coffee maker switches off after 30 minutes. However, you can adjust the time after which the appliance automatically switches off from 10 to 120 minutes. To adjust the automatic switch-off time, follow the steps below.
- Make sure that the appliance is switched off but the mains plug is in the wall socket.
- Press the center of the control knob until the display starts flashing.
- Turn the control knob to increase or decrease the time. 1 is 10 minutes, 2 is 20 minutes, 3 is 30 minutes and so on until 12 is 120 minutes.
- Press the center of the control knob to confirm the automatic switch-off time.
- My Philips Grind & Brew coffee is not strong enough
-
There are several ways to increase the coffee strength. Although you can brew coffee from freshly ground coffee beans, keep in mind that this Philips coffee maker is not a fully automatic espresso machine.
If you use the grinder to brew coffee with fresh coffee beans we advise you to:
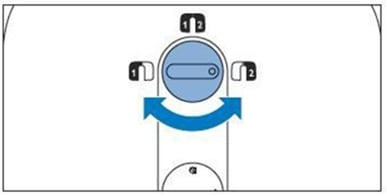
Step 1 Checking bean containers
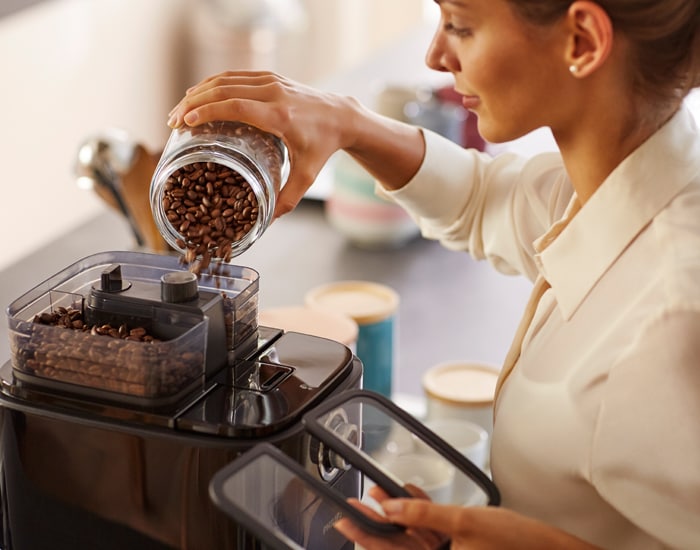
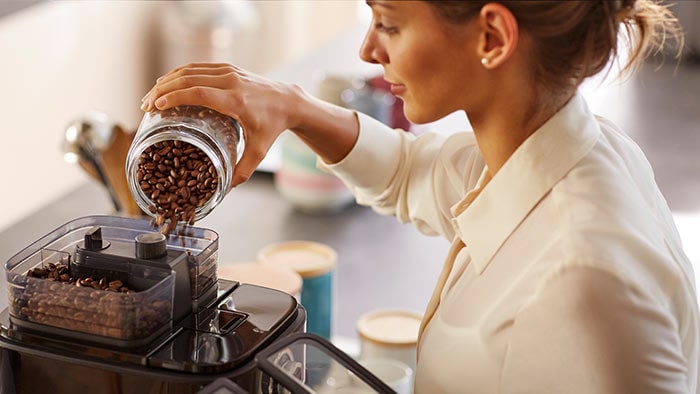
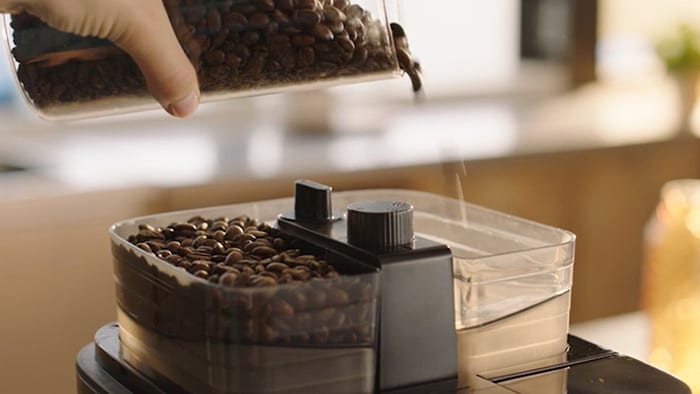
Check if the bean containers contain enough beans for the quantity of coffee you want to brew and make sure that the container selector is pointing to the right bean container.
Step 2 Adjusting coarseness
Try to select a finer coarse grind with the coarseness knob to get a stronger coffee.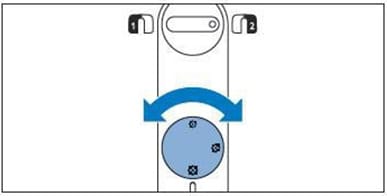
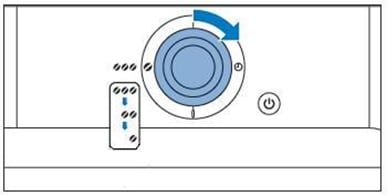
Step 3 Selecting coffee strength
Push the strength select button and turn the knob to select the desired coffee strength: mild (1 bean), medium (2 beans), or strong (3 beans).
Step 4 - Adjusting the amount of water in the tank
Make sure that you fill the water tank with the correct amount of water for the cups of coffee you want to brew.
Note:
The coffee maker always uses the total amount of water that is in the water tank. The number of cups selected with the knob only affects the amount of beans that are ground by the grinder and not on the amount of water that is used. By selecting the number of cups, you determine the amount of coffee beans the grinder grinds.Step 5 - Pre-ground function selected
Be careful that you do not accidently selected the pre-ground coffee function, as this will mean that the grinder will not start grinding the beans and no ground coffee will end up in the filter basket.
When using pre-ground coffee, we advise you to:
1) Make sure the amount of pre-ground coffee in the filter is consistent with the amount of water in the water reservoir.
Note:How much pre-ground coffee you use is a matter of personal taste. For medium-strong coffee, use one measuring spoon (approximately 4-5g) for each cup (125ml).
The strength select button and the coarseness knob do not work when you have selected the pre-ground coffee function.2) Increase the coffee strength by increasing the amount of pre-ground coffee, by decreasing the amount of water, or by using coffee of a stronger blend or flavor.
- Why is my Philips Grind & Brew noisier during brewing?
-
If your Philips Grind & Brew makes more noise, produces more steam and needs more time to brew the coffee, it is clogged with scale and needs to be descaled.
FAQs
- Which material is the grinder made of?
-
The Grind & Brew range use a stainless steel conical grinder.
- Where can I buy a new jug for my Philips coffee maker?
-
New jugs can be bought:
- In a hardware store
- Through a Philips certified Service Center
- Online via the Philips Online Shop (specific countries only). Online shop
To order the right accessories for your appliance, please check the reference number at the bottom of the appliance (HD..../....).
For more detailed information, we advise you to contact the Philips Consumer Care Center in your country.
- Can I use espresso beans in my Philips Grind & Brew?
-
No, you can only use coffee beans in this Philips coffee maker.
Espresso beans have a different roast and composition and are meant for brewing coffee under high pressure in espresso machines.
If you use espresso beans in this coffee maker, you will not get the optimal grind and taste.
Note: To prevent malfunction, never fill the coffee bean container with caramelized or frozen coffee beans, pre-ground coffee, freeze-dried coffee or anything else that could damage the coffee maker.
- How often do I need to descale my Philips Grind & Brew?
-
In case of normal use (two full jugs of coffee every day), descale the appliance:
- 2 or 3 times a year if you use soft water (up to 18dH)
- 4 or 5 times a year if you use hard water (over 18dH) You can contact your local water board for information about the water hardness in your area.
Descaling tips:
To descale the coffee maker, you can use any liquid descaler or use white household vinegar (4% acetic acid). We advise you not to use powder descalers or descaling tablets. If these powders or tablets are not dissolved completely, they can leave traces and harm the inside of your coffee maker.
Why it is important to descale?
- Ensure that you continue to brew good quality coffee
- Keep the brewing time constant
- Extend the lifetime of your coffee maker
- Reduce the risk of breakdown
- What is the best type of coffee for this coffeemaker?
-
The only type of coffee which can be used is standard coffee beans.
It's important to avoid using following types of coffee:
- espresso beans - different roast and composition, meant for brewing coffee under high pressure in espresso machines
- caramelized beans - may damage the grinder
- frozen beans - may damage the grinder
- pre-ground coffee - may damage the grinder
- freeze - dried coffee - may damage the grinder
Using these types of coffee may lead to damaging the coffeemaker and losing the warranty.
- Why does my Philips Grind & Brew make too much coffee?
-
The number of cups selected has no effect at all on the amount of water that is used. The Philips coffee maker always uses up all the water that is in the water tank.
Controlling the amount of water
The number of cups you select (2-10 cups) only determines the grinding time. By selecting the number of cups you want to brew, you determine the amount of beans the grinder has to grind.
Always make sure that you fill the water tank with the correct amount of water for the number of cups you want to brew.

Get inspired
Cappuccino
Americano
Iced Americano

Cappuccino
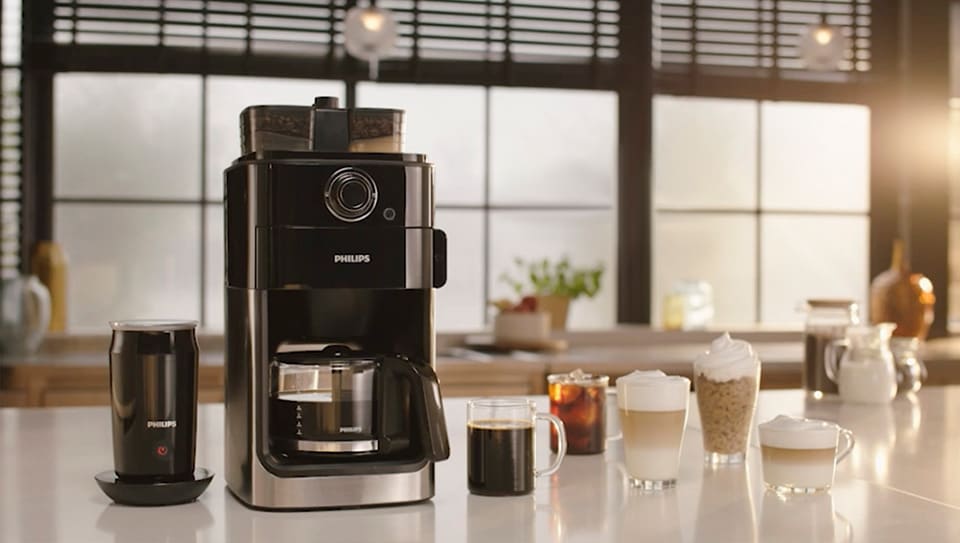
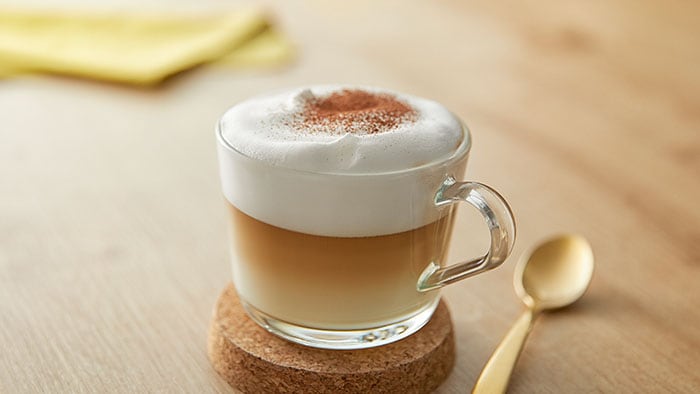
Ingredients: · Coffee · Water · Milk · Cocoa powder Steps: 1.Fill the water tank with water 2.Make sure the bean container is at least half full. Put a no.4 paper filter or permanent filter in the filter basket 3.Start brewing coffee 4.Pour milk into the milk frother, and start frothing the milk 5.Pour coffee into the cup(s) 6.Pour milk foam gently into the cup(s) 7.Garnish with additional cocoa powder if desired
Latte Macchiato
Ingredients: · Coffee · Water · Milk · Cocoa powder Steps: 1.Fill the water tank with water 2.Make sure the bean container is at least half full. Put a no.4 paper filter or permanent filter in the filter basket 3.Start brewing coffee 4.Pour milk into the milk frother, and start frothing the milk 5.Pour milk foam gently into the cup(s) 6.Pour coffee into the cup(s) 7.Garnish with additional cocoa powder if desired
Americano
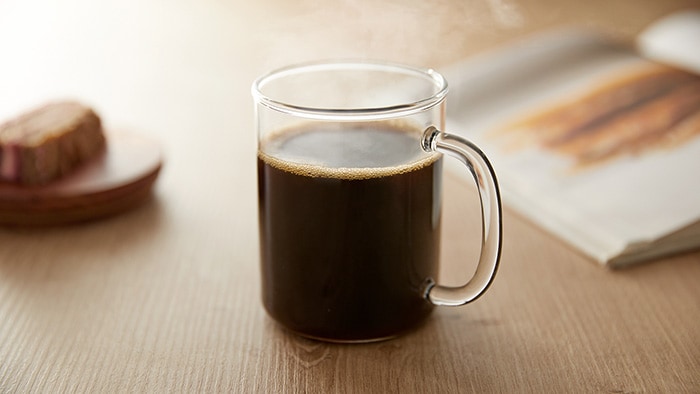
Ingredients: · Coffee beans · Water Steps: 1.Fill the water tank with water 2.Make sure the bean container is at least half full. Put a no.4 paper filter or permanent filter in the filter basket 3.Start brewing coffee 4.Pour coffee into the cup(s)
Iced Americano
Ingredients: · Coffee beans · Water · Ice cubes Steps: 1.Fill the water tank with water 2.Make sure the bean container is at least half full. Put a no.4 paper filter or permanent filter in the filter basket 3.Start brewing coffee 4.Put the ice cubes in the cup(s) 5.Pour coffee into the cup(s)
Get inspired
Cappuccino

Ingredients: · Coffee · Water · Milk · Cocoa powder Steps: 1.Fill the water tank with water 2.Make sure the bean container is at least half full. Put a no.4 paper filter or permanent filter in the filter basket 3.Start brewing coffee 4.Pour milk into the milk frother, and start frothing the milk 5.Pour coffee into the cup(s) 6.Pour milk foam gently into the cup(s) 7.Garnish with additional cocoa powder if desired
Latte Macchiato

Ingredients: · Coffee · Water · Milk · Cocoa powder Steps: 1.Fill the water tank with water 2.Make sure the bean container is at least half full. Put a no.4 paper filter or permanent filter in the filter basket 3.Start brewing coffee 4.Pour milk into the milk frother, and start frothing the milk 5.Pour milk foam gently into the cup(s) 6.Pour coffee into the cup(s) 7.Garnish with additional cocoa powder if desired
Iced Americano

Ingredients: . Coffee beans · Water · Ice cubes Steps: 1.Fill the water tank with water 2.Make sure the bean container is at least half full. Put a no.4 paper filter or permanent filter in the filter basket 3.Start brewing coffee 4.Put the ice cubes in the cup(s) 5.Pour coffee into the cup(s)
Share your recipes #MyCoffeeRecipe
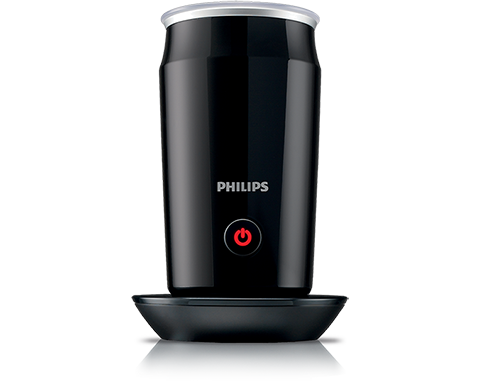
Get your own Philips Milk Frother to make more delicious coffee recipes
Find user manual
To find more detailed information, type the name or product number of your Grind & Brew.The product number can be found at the bottom of the appliance. (HD776X/XX)
Search by name or product number
Search by product number.
We found {number} products that are available outside your country, so local promotions may not apply.
Show productsFound {number} products
Found your model, but...
This product is not available in your country, but we found one in another country
Please select your model based on the last 2 digits of your product number shown in blue.
Found your model!
foundation-catalog.se01c-prx-search.search-sub-heading7
This product is available in another country. You might not get all of the services available
If this is the correct one, please select it below. Otherwise, search again.
Product image
Product description
Model number
