Find out how to assemble your Philips Avent Grippy cup. Follow these simple steps.
How to assemble my Philips Avent Grippy cup
Published on 2019-08-06
Play Pause
Assemble your Grippy cup with a Silicone spout
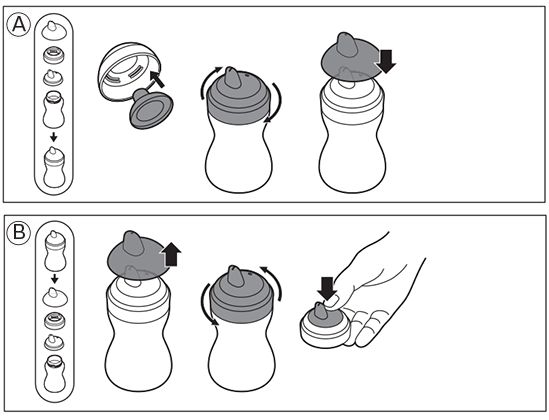
To assemble your Philips Avent spout cup with a Silicone spout. Follow these instructions
- Pull the spout through the screw ring until it snaps into place
- Screw the drinking top on the spout cup firmly, but do not overtighten
- Put the cap on the spout for hygienic protection

Assemble your Grippy cup with a Soft spout
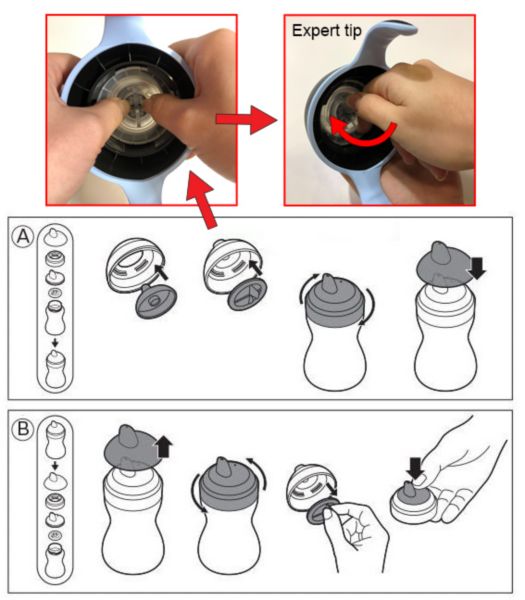
To assemble your Philips Avent Grippy cup with a Soft spout. Follow these instructions
- Pull the spout through the screw ring until it snaps into place
- Place and secure the valve until you feel it snaps into place (see image below)
- Turn the valve about a quarter of a turn (90 degrees) to ensure a tight fit (see image below)
- Screw the drinking top on the spout cup firmly, but do not overtighten
- Put the cap on the spout for hygienic protection

Assemble your Grippy cup with a Hard spout
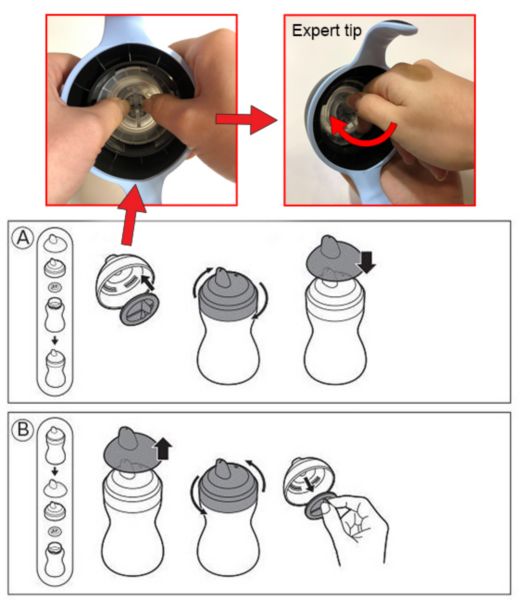
To assemble your Philips Avent Grippy cup with a Hard spout. Follow these instructions
- Place and secure the valve underneath the screw ring until you feel it snaps into place
- Turn the valve about a quarter of a turn (90 degrees) to ensure a tight fit (see image below)
- Screw the drinking top on the spout cup firmly, but do not overtighten
- Put the cap on the spout for hygienic protection


