You can easily disassemble and assemble your Philips Avent feeding bottles to keep them nice and clean. Just follow these simple step-by-step instructions. You can also find them in the user manual of your bottle and/or nipples.
How to assemble the Philips Avent feeding bottle
Published on 2019-11-13
Step 1
Before first use: boil the bottle for 5 minutes.
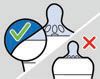
Before each use: closely inspect all items. Pull the nipple in all directions to check for wear and tear. Dispose the bottle/nipple at first signs of damage or weakness
Step 2
Use the tongs to keep the bottle and nipple as sterile as possible when assembling.
The nipple is easier to assemble if you wriggle it upwards instead of pulling it up in a straight line.
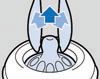
Step 3
Make sure you pull the nipple through until its lower rim is even with the screw ring.
Step 4
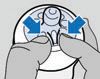
Massage the valve to make sure it's open and ensure the anti-colic feature is working.
For optimum performance, pinch and massage the number on the nipple between index finger and thumb prior to a feed.
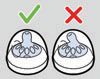
Step 5
Place the cap vertically onto the bottle so that the nipple sits upright.
For hygienic reasons:
We recommend replacing nipples after 3 months. Store nipples in a dry, covered container.
Purchase new bottles and nipples via Philips Online Shop.
")
")
")
")
")