Congratulations on your purchase and welcome to Philips Norelco!
To fully benefit from the support that Philips Norelco offers, register your product at: www.norelco.com/register.
You can find the model number on the back of your product.
The full model number (e.g. MG1234/56) is located on the bottom of the packaging, your receipt or order confirmation.

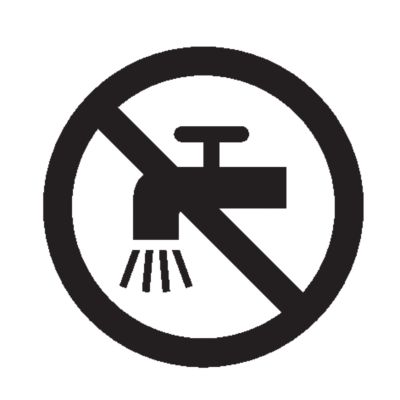
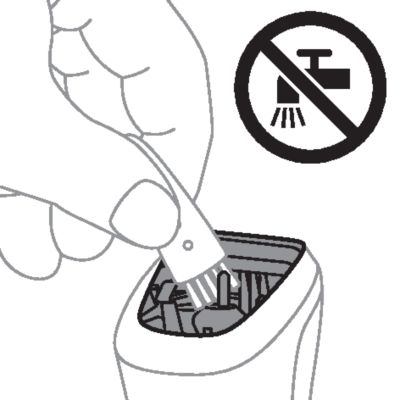
Never rinse the handle under the tap or immerse it in water. Only the cutting element and the attachments can be rinsed under the tap when detached from the handle.
Getting the handle wet may cause irreversible damage to your product. This will result in the product becoming unusable.
- This product can only be used without cord.
- Switch off the product before removing or attaching attachments and before cleaning.
- Clean the product after each use.
This product has no other user-serviceable parts. For assistance call 1-800-243-3050.
- Nose and ear hair trimmer
- Cutting element (MG3919)
- Precision trimmer (MG3939)
- Cutting element (MG3939)
- On/off button
- Battery status indicator
- Socket for small plug
- USB cable
- Note:The power source is not included. A suitable power source (e.g. Philips HQ87) is available via www.philips.com/support.
- Stubble guard 1 mm (3/64 in.)
- Beard guard 3 mm (1/8 in.)
- Beard guard 5 mm (3/16 in.)
- Beard guard 7 mm (9/32 in.)
- Stubble guard 2 mm (5/64 in.) (MG3919)
- Hair guard 9 mm (3/8 in.)
- Hair guard 12 mm (15/32 in.)
- Hair guard 16 mm (21/32 in.)
Not shown: cleaning brush and pouch

- Charging or using the product at temperatures below 41 °F / 5 °C or higher than 95 °F / 35 °C adversely affects the lifespan of the battery.
- If the product is subjected to a major change in temperature, pressure or humidity, let the product acclimatize for 30 minutes before use.
Charge the product before first use and when the motor starts working more slowly.
It takes 10 hours (MG3919) or 8 hours (MG3939) to fully charge the battery. When the product is fully charged, it has a cordless operating time of up to 60 minutes.
Warning: Keep the USB cable and the USB power source dry.
- Make sure the product is switched off.
- Plug it in
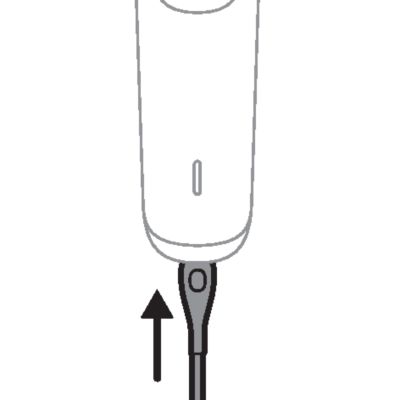
- Insert the small plug of the USB cable into the socket in the bottom of the product.
- Connect an adapter
- Insert the USB plug into the USB power source (not included).
- Attach to the power source
- Insert the USB power source into the power outlet.
- The battery charge indicator lights up continuously, when the product is connected to the power outlet.
- Unplug to use
- After charging, remove the USB power source from the power outlet and pull the small plug out of the product.


Always check the product and all accessories before you use it. Do not use the product or any accessory if it is damaged, as this may cause injury. Always replace a damaged part with one of the original type.
Because of hygiene, only one person should use the product.
New Topic (54)
- When trimming for the first time, start by using the guard with the maximum trimming length setting to familiarize yourself with the product.
- Since all hairs do not grow in the same direction, you may want to try different trimming directions (i.e. upwards, downwards, or across). Practice is best for optimum results.
- Always make smooth and gentle movements and make sure that the surface of the guard always stays in contact with your skin.
- For best results, use the product on clean, dry hair, as wet hair tends to stick to the body.
- When too many hairs have accumulated on the product, remove the hairs before and/or during use, for best trimming results.
Changing attachments
Detaching and attaching cutting elements
-
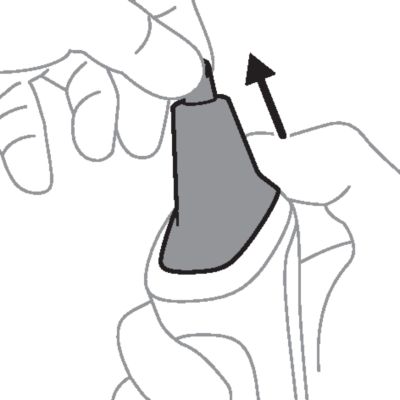
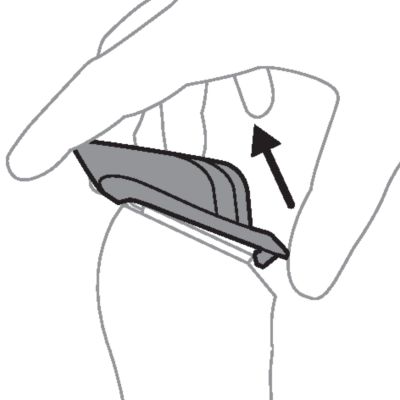
- To detach a cutting element, place your thumb below the teeth of the cutting element and gently push upwards until the cutting element comes off the handle.
- Press the teeth downwards
-
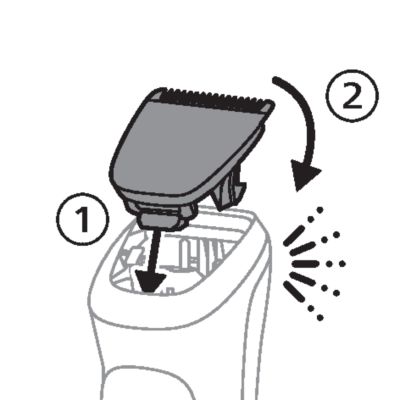
- To attach a cutting element, insert the plastic notch at the back of the cutting element into the guiding slot in the handle. Then gently press the teeth of the cutting element downwards until the cutting element clicks into place.

Detaching the nose trimmer
-
- Place your finger on the recess at the back of the attachment and push the attachment off the handle. Use your other hand to prevent the attachment from dropping on the floor.
Detaching and attaching guards
-
- To attach any type of guard onto the cutting element,slide the front part of the guard onto the teeth and press the plastic notch at the back of the guard downwards until it clicks into place.
- Carefully push the back part off
-
- To detach any type of guard from the cutting element, carefully push its back part off the product and then slide it off the cutting element.

Turning the product on and off
-
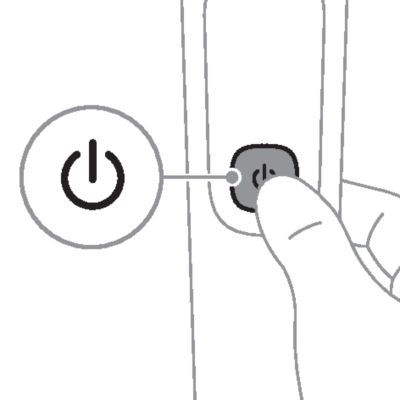
- Press the on/off button once to switch the product on or off.
Attachments for use on beard
Always comb your beard or moustache with a fine comb before you start trimming.
Full-size hair trimmer
-
- To trim hair close to the skin, place the flat side of the cutting element against your skin and make strokes against the direction of hair growth.
-
- For contouring, hold the cutting element perpendicular to the skin and move it upwards or downwards with gentle pressure.
- Switch off and clean the product after each use.

Beard guards MG7790, MG7750, MG 5790, MG5760, MG5750
- Attach a stubble or beard guard to the cutting element.
-
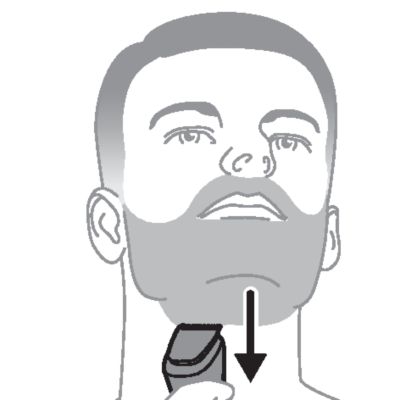
- To trim in the most effective way, move the guard against the direction of hair growth. Make sure that the surface of the guard always stays in contact with the skin.
- Switch off and clean the product after each use.
Attachments for use on head
Always comb your hair before you start trimming.
For best results, use the product on clean, dry hair.
Hair guards
- Attach a hair guard to the cutting element.
-
- Move the product slowly over the crown from different directions to achieve an even result. Always move the product against the direction of hair growth. Press lightly. Make sure that the surface of the guard always stays in contact with the skin.
- Make overlapping passes over the head to ensure that all hair that should be cut has been cut.
- Gently shake the hairs off the product in between strokes to prevent hairs from collecting between the cutting element and the guard.
- Switch off and clean the product after each use.

Precision attachments for use on face
Detail trimmer
-
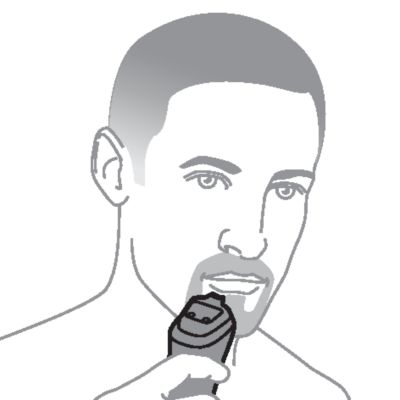
- Hold the precision trimming head perpendicular to the skin and move the trimming head upwards or downwards with gentle pressure.
- Switch off and clean the product after each use.
Nose trimmer
- Make sure nasal passages are clean. Make sure outer ear channels are clean and free from wax.
- Do not insert the cutting element too deep into your nostrils or ear channels (max. 3/16 in. or 5 mm).
- When trimming both nose and ear hair, make firm, rotary movements to ensure that the cutting element reaches all the hairs.
- Clean the nose and ear hair trimmer after each use.
Never rinse the handle under the tap or immerse it in water. Only the cutting element and the attachments can be rinsed under the tap when detached from the handle.Switch off the product before removing or attaching attachments and before cleaning.
Only use cold or lukewarm water to clean the cutting element and the attachments.
Never use scouring pads, abrasive cleaning agents or aggressive liquids such as gasoline or acetone to clean the product.
Never dry the cutting element with a towel or tissue, as they may get caught in the teeth and cause damage.
- Make sure that the product is switched off and that the USB power source has been removed from the power outlet and from the product.
- Wipe the handle with a dry cloth.
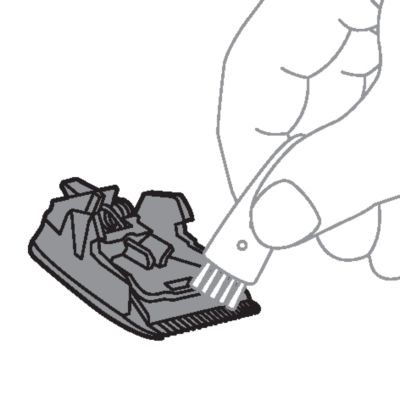
Cleaning with brush
- Detach any guard from the product and clean it with the cleaning brush.
- Detach the cutting element from the product. Clean the teeth and the inside of the cutting element with the cleaning brush.
- Clean the inside of the hair chamber with the cleaning brush.
Cleaning attachments under the tap
- Detach any guard and the cutting element from the product and rinse them under the tap.
- Carefully shake off excess water and let the parts air-dry completely before reattaching them to the product.

Cleaning the nose trimmer
Clean the nose and ear hair trimmer immediately after use and when a lot of hair or dirt has accumulated on the cutting element.
- Detach the nose and ear hair trimmer from the product.
-
- Rinse the nose and ear hair trimmer head under running tap water.
- For a thorough clean, immerse the nose and ear hair trimmer head in a bowl with warm water for a few minutes to soak and soften the debris. Then rinse the nose and ear trimmer head under running tap water to remove stubborn debris.
- Carefully shake off excess water and let all parts air-dry completely before reattaching them to the product.

Do not place or store the product where it can fall or be pulled into a tub or sink, water or other liquid.
- Make sure that the product is switched off and that the USB power source has been removed from the power outlet and from the product.
- Do not wrap the USB cable around the product when storing.
- Store the product, the USB power source and all the accessories in the pouch supplied. Place the pouch in a safe, dry location, where it will not be crushed, banged, or subject to damage.
- Make sure that the product and the accessories are dry before you store them in the pouch.
For assistance, visit our website: www.philips.com/support or call toll free 1-800-243-3050.
- This product contains a rechargeable NiMH battery which must be disposed of properly.
- Contact your local town or city officials for battery disposal information. You can also call 1-800-822-8837 or visit: www.call2recycle.org for battery drop-off locations.
- For assistance, visit our website: www.philips.com/support or call 1-800-243-3050 toll free.
- Your product is designed and manufactured with high quality materials and components, which can be recycled and reused. For recycling information, please contact your local waste management facilities or visit: www.recycle.philips.com.

If you are not fully satisfied with your product send the product back and we’ll refund you the full purchase price.
The product must be shipped prepaid by insured mail, insurance prepaid, have the original sales receipt, indicating purchase price and date of purchase.
We cannot be responsible for lost mail.
The product must be postmarked no later than 45 days after the date of purchase. Philips reserves the right to verify the purchase price of the product and limit refunds not to exceed suggested retail price.
To obtain the money-back guarantee service, please go to www.PhilipsMoneyBack.com and follow the simple 3-step process.
Delivery of refund check will occur 6–8 weeks after receipt of returned product.
")
")
")
")
")