When using an electric product, basic precautions should always be followed, including the following:
Read all instructions before using this product.
DANGER
To reduce the risk of electric shock:
- To charge the product, only use a USB power source on a certified product with output rating 5 V, ≥ 1 A. For safe charging in a moist environment (e.g. in a bathroom), only use an IPX4 (splash-proof) power source. A suitable power source (e.g. Philips HQ87) is available via www.philips.com/support. If you need support finding the correct USB power source, contact Philips support at 1-888-744-5477. Using a non-certified USB power source may cause hazards or serious injuries.
-
- This product is Qi compliant. To charge the product wirelessly, use a Qi-certified charging pad (if any). Carefully shake off excess water before placing the product on the Qi charging pad. During charging, do not place any foreign (metal) objects on the Qi charging pad.

-
- Keep the USB cable and the USB power source dry.
- Do not reach for a corded product that has fallen into water. Unplug immediately from the power outlet.
- Do not place or store the product where it can fall or be pulled into a tub or sink. Do not place or drop the product into water or other liquid.
-
- This product is waterproof. It is suitable for use in the bath or shower and for cleaning under the tap. For safety reasons, the product can therefore only be used without cord.

- This product does not work while it is connected to the power outlet. Except when charging, always unplug this product from the power outlet.
- Remove USB power source from power outlet and product before cleaning.
WARNING
To reduce the risk of burns, fire, electric shock, or injury to persons:
- This product is not intended for use by persons (including children) with reduced physical, sensory or mental capabilities, or lack of experience and knowledge, unless they have been given supervision or instruction concerning use of the product by a person responsible for their safety. Children should be supervised to ensure that they do not play with the product.
- Use this product only for its intended household use as described in this manual. Misuse can lead to hazards or serious injuries. Do not use attachments not recommended by Philips North America LLC. Accessories supplied may vary for different products.
- Never operate this product if it has a damaged USB power source, if it is not working properly, after it has been dropped or damaged, or after the product or the USB power source has been dropped into water. For assistance call 1-888-744-5477.
- Keep the USB cable and the USB power source away from heated surfaces.
- Never drop or insert any object into any opening.
- Do not use the USB power source in or near a power outlet that contains an electric air freshener to prevent damage to the USB power source.
- Do not use product outdoors or operate where aerosol (spray) products are being used or where oxygen is being administered.
- Always check shaving heads (guards and cutters) before using the product. Do not use the product if cutters or guards are damaged, as injury may occur.
- Always attach the USB cable to the USB power source and the product first, then attach the USB power source to the power outlet. To disconnect, set all controls to 'off' position. Then remove the USB power source from the power outlet.
- Plug USB power source directly into power outlet. Do not use an extension cord.
- Unplug USB power source before plugging in or unplugging the product.
- Because of hygiene, only one person should use the product.
- Clean the product after each use.
- Only use cold or lukewarm water to clean the product.
- Never use compressed air, scouring pads, abrasive cleaning agents or aggressive liquids such as gasoline or acetone to clean the product.
- The batteries used in this product may present a fire or chemical burn hazard if mistreated. Do not disassemble, heat above 100 °C (212 °F) or incinerate.
- This product contains a magnet. If you have a pacemaker or other implanted device, consult your doctor or the manufacturer of the implanted device before you use this product.
- Only use original Philips accessories or consumables.
- Charge, use and store the product at a temperature between 10 °C/50 °F °C and 95 °F / 35 °C.
- Keep product and batteries away from fire and do not expose them to direct sunlight or high temperatures.
- If the product becomes abnormally hot or smelly, changes color or if charging takes longer than usual, stop using and charging the product and contact Philips.
- Do not place products and their batteries in microwave ovens or on induction cookers.
- Do not open, modify, pierce, damage or dismantle the product or battery to prevent batteries from heating up or releasing toxic or hazardous substances. Do not short-circuit, overcharge or reverse charge batteries.
- If batteries are damaged or leaking, avoid contact with the skin or eyes. If this occurs, immediately rinse well with water and seek medical care.
- When you handle batteries, make sure that your hands, the product and the batteries are dry.
- To avoid accidental short-circuiting of batteries after removal, do not let battery terminals come into contact with metal objects (e.g. coins, hairpins, rings). Do not wrap batteries in aluminum foil. Tape battery terminals or put batteries in a plastic bag before you discard them.
SAVE THESE INSTRUCTIONS
Congratulations on your purchase and welcome to Philips Norelco!To fully benefit from the support that Philips Norelco offers, register your product at www.philips.com/register.
You can find the model number on the back of your product.
The full model number (e.g. XX0000/00) is located on the bottom of the packaging, your receipt or order confirmation.
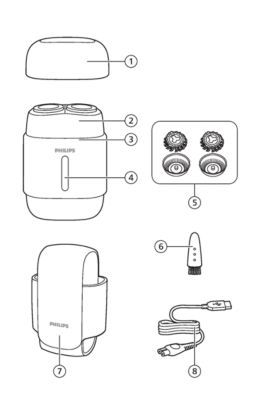
- Protective cap
- Shaving unit
- Charging light
- On/off swipe bar
- Replacement shaving heads (for S791 only)
- Cleaning brush
- Travel pouch
- USB cable
- Note: A suitable power source (e.g. Philips HQ87) is available via www.philips.com/support.
Always check the product and all accessories before use. Do not use the product or any accessory if it is damaged, as this may cause injury. Always replace a damaged part with one of the original type.
Battery low
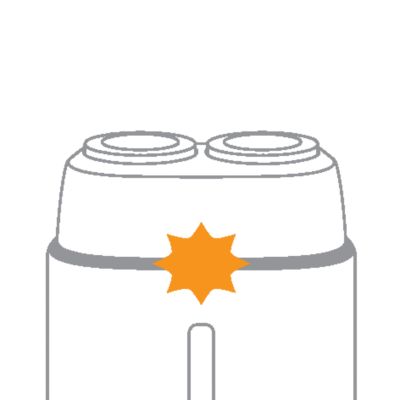
When the battery is almost empty (when there are only 5 or fewer shaving minutes left), the charging light flashes orange.
Charging
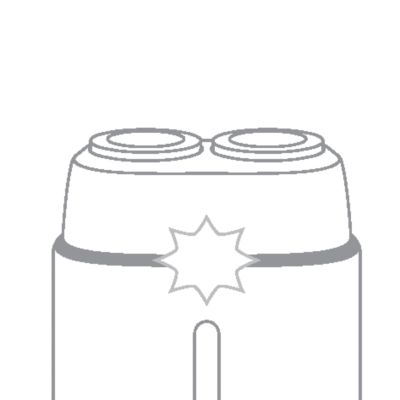
When the shaver is charging, the charging light flashes white.
Battery fully charged
When the battery is fully charged, the charging light lights up white continuously.
Note: After approx. 30 minutes, the charging light goes out to save energy.
Quick charge
When you start charging the empty battery, the charging light flashes white quickly. After approx. 5 minutes the charging light flashes white slowly. The shaver now contains enough energy for one shave.
Charge the shaver before you use it for the first time and when the charging light indicates that the battery is almost empty.
When you charge the shaver for the first time or after a long period of disuse, let it charge until the charging light indicates that the battery is fully charged.
- Charging takes approx. 1 hour.
- Quick charge: After approx. 5 minutes of charging, the battery contains enough energy for one shave.
- A fully charged shaver has a shaving time of up to 60 minutes.
Note: You cannot use the product while it is charging.
Charging with a USB supply unit
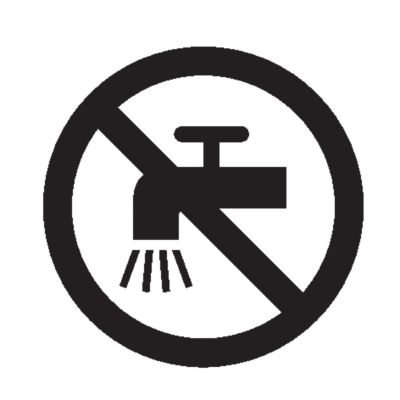
Danger: Keep the USB cable and the USB power source dry.
- Make sure that the product is switched off.
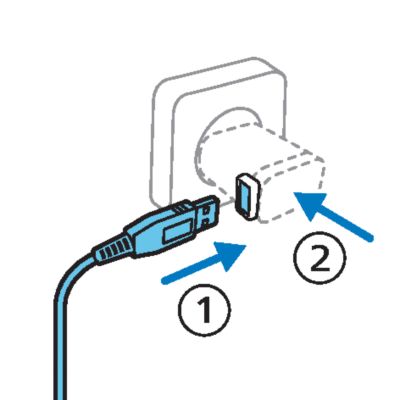
- Insert the small plug of the USB cable into the socket in the bottom of the product.
- Insert the USB plug into the USB power source (not included).
-
- Insert the USB power source into the power outlet.
- The charging light on the product will indicate the charging status.
- After charging, remove the USB power source from the power outlet and pull the small plug out of the product.
Charging with a wireless Qi charging pad
This product supports wireless charging. When the battery is empty, it takes approx. 2 hours to fully charge the battery using a Qi-certified charging pad.
To charge the product wirelessly, place it on a Qi-certified charging pad with the on/off swipe bar facing up.
Note: The actual wireless charging time may differ depending on conditions such as the technical specifications of the charging pad, the ambient temperature, and the technical specifications of the supply unit.
Switching the appliance on and off
-
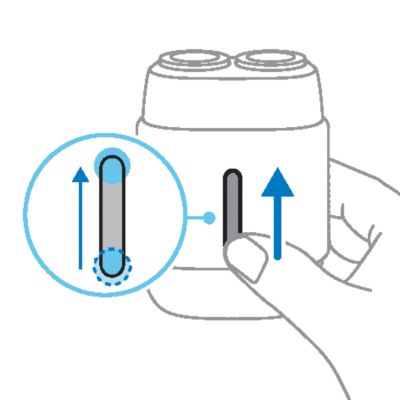
- To switch on the appliance, swipe upwards on the on/off swipe bar.
-
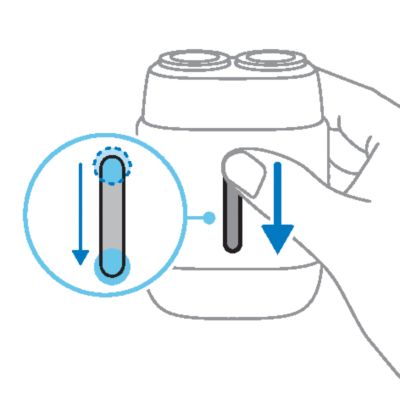
- To switch off the appliance, swipe downwards on the on/off swipe bar.
Shaving
For the best results on skin comfort, pre-trim your beard if you have not shaved for 3 days or longer.
You can use this product either wet or dry, or even in the shower. For a wet shave, apply some water and shaving foam or gel to your skin and rinse the shaving heads under the tap with warm water before following the steps below.
- Switch on the shaver.
-
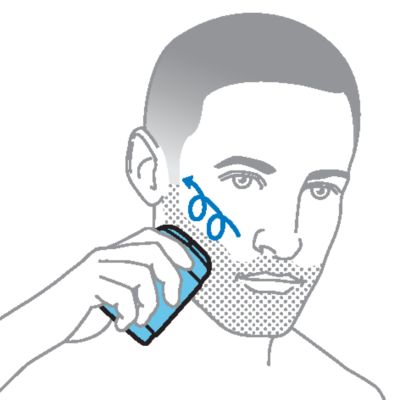
- Move the shaver in circular movements over your skin to catch hair growing in all directions. Make sure each shaving head is fully in contact with the skin. Exert gentle pressure for a close, comfortable shave.
-
- Note: You can attach the protective cap onto the bottom of the shaver for better grip during shaving.
- Note: Do not press too hard, as this can cause skin irritation.
-
- Note: If you are shaving with gel or foam, rinse the shaving unit regularly during your shave to ensure that it continues to glide smoothly over your skin.
- Switch off and clean the product after each use.
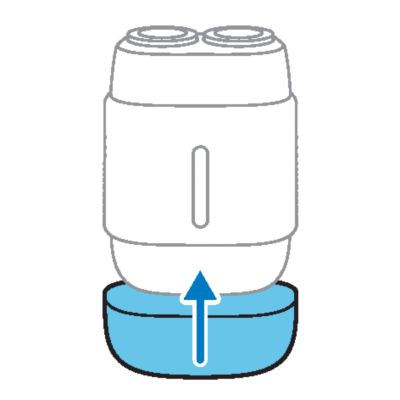
- Put the protective cap on the shaver after use to prevent the shaving heads from becoming damaged and dirty.
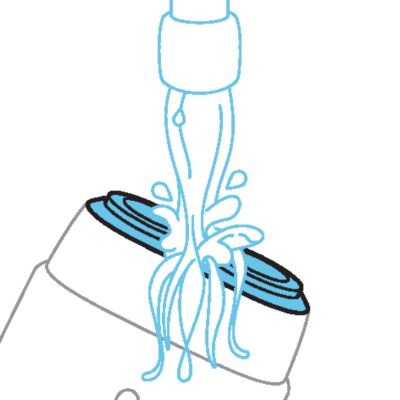
Note: Make sure you rinse all foam or shaving gel off the appliance.
Put it to the test US
- 21 Day Trial and Conversion Process. It is a fact that your skin and beard need time to adjust to a new grooming system.
- Use your new shaver exclusively for 3 weeks to fully enjoy the closeness of a Philips Norelco shave.
- At first you may not get as close a shave as you expect, or your face may even become slightly irritated. This is normal since your beard and skin will need time to adjust. Invest 3 weeks and you'll soon experience the full joy of your new shaver.
- Stick with it! If you alternate shaving methods during the adjustment period, it may make it more difficult to adapt to the Philips Norelco shaving system.
- If you are still not convinced after 21 days, Philips Norelco will refund you the full purchase price as long as the request is received within 45 days of purchase.
Regular cleaning guarantees better shaving results.
Never clean, remove or replace the shaving unit while the shaver is switched on.
Do not touch shaving heads with hard objects as this may dent or damage the precision-made slotted shaving heads.
Do not use abrasives, scourers or aggressive liquids such as gasoline or acetone to clean the shaver.
Cleaning the shaver with the cleaning brush
Clean the shaver after every shave for optimal shaving performance.
- Switch off the shaver.
- Clean the surface of the shaving unit with the cleaning brush supplied.
-
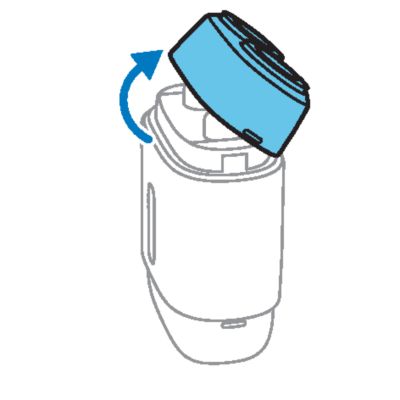
- Remove the shaving unit from the shaver.
- Clean the inside of the shaving unit with the cleaning brush.
- Clean the hair chamber with the cleaning brush.
-
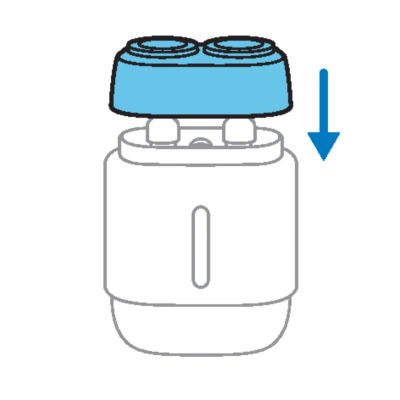
- Put the shaving unit back onto the shaver.
Cleaning the shaving unit under the tap
Caution: Always check if the water is too hot, to prevent burning your hands.
Clean the shaver after every shave for optimal shaving performance.
While rinsing shaving heads, water may drip out of the base of shaver. This is a normal occurrence. Internal electric parts are in a waterproof compartment so the shaver will be protected against water damage.
-
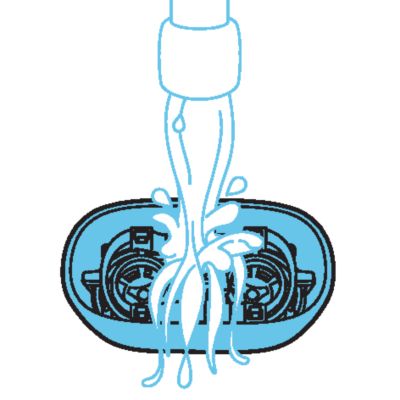
- Switch on the shaver. Rinse the shaving unit with cold or lukewarm water.
-
- Switch off the shaver. Remove the shaving unit from the shaver.
-
- Rinse the shaving unit and hair chamber with lukewarm water.
-
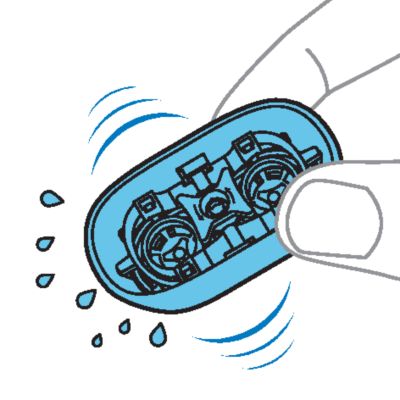
- Carefully shake off excess water and let the shaver air dry.
-
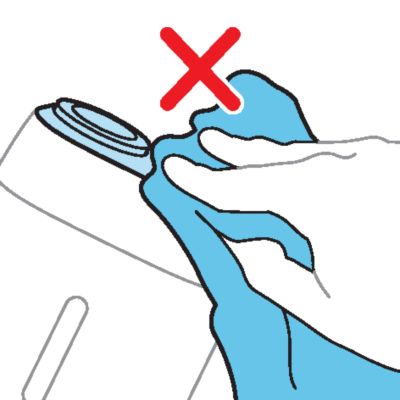
- Caution: Never dry the shaving unit with a towel or tissue, as this may damage the shaving heads.
-
- Put the shaving unit back onto the shaver.
Thorough cleaning
Clean the shaving heads thoroughly once a month for optimal performance.
- Switch off the shaver.
-
- Remove the shaving unit from the shaver.
-
- Rinse the shaving unit and hair chamber with lukewarm water.
-
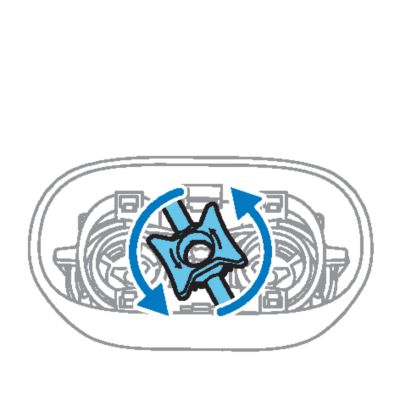
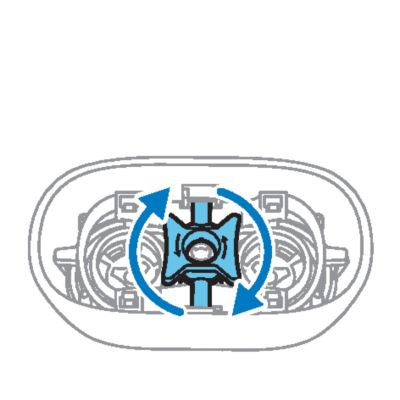
- Turn the lock counterclockwise and remove the retaining frame. Place it aside in a safe place.
-
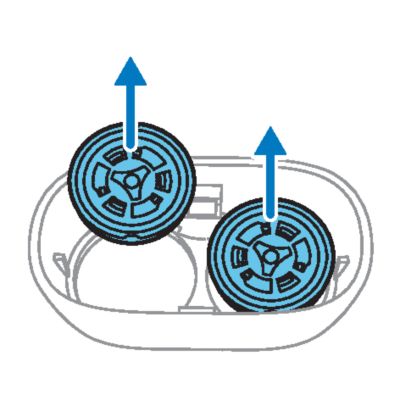
- Remove and clean one shaving head at a time. Each shaving head consists of a cutter and a guard.
- Note: Do not clean more than one cutter and guard at a time, since they are all matching sets. If you accidentally mix up the cutters and guards, it may take several weeks before optimal shaving performance is restored.
-
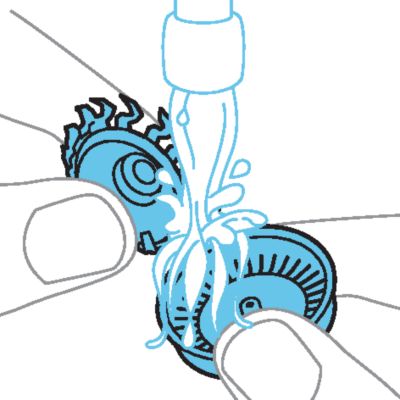
- Remove the cutter from the shaving guard and clean both parts under the tap.
- Put the cutter back into the guard.
-
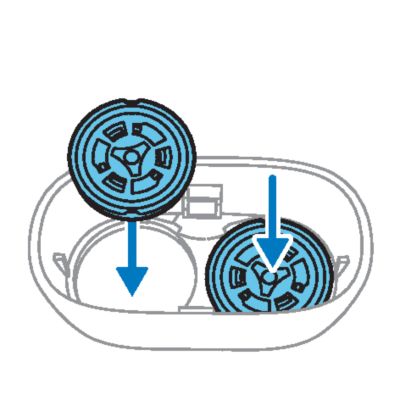
- Put the shaving heads back into the shaving unit.
-
- Put the retaining frame back into the shaving unit and turn the lock clockwise.
-
- Put the shaving unit back onto the shaver.
- Note: If you cannot attach the shaving unit onto the product easily, check if you have inserted the shaving heads properly and if the retaining frame is locked.
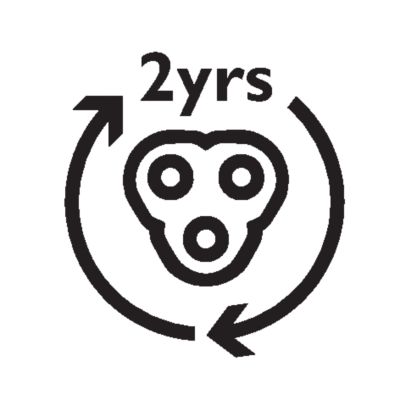
For maximum shaving performance, we advise you to replace the shaving heads every two years. Replace damaged shaving heads immediately. Always replace the shaving heads with original Philips shaving heads.
- Switch off the shaver.
-
- Remove the shaving unit from the shaver.
-
- Turn the lock counterclockwise and remove the retaining frame. Place it aside in a safe place.
-
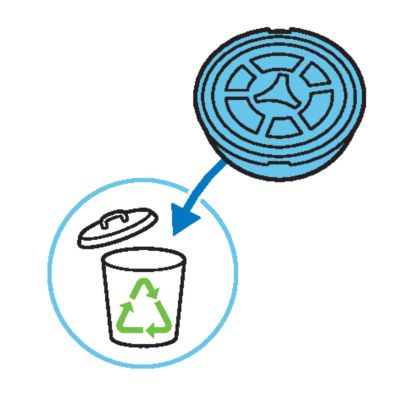
- Remove the shaving heads from the shaving unit. Discard the used shaving heads immediately to avoid mixing them with the new shaving heads.
-
- Place new shaving heads in the shaving unit.
-
- Put the retaining frame back into the shaving unit and turn the lock clockwise.
-
- Put the shaving unit back onto the shaver.
- Note: If you cannot attach the shaving unit onto the product easily, check if you have inserted the shaving heads properly and if the retaining frame is locked.
This product has no other user-serviceable parts. For assistance call 1-888-744-5477.
Put the protective cap on the product to prevent damage.
Note: Always allow the product to dry completely before you store it.
Storage in travel pouch
Store the shaver in the travel pouch supplied.
Note: Make sure the shaver is dry before you store it in the travel pouch.
Replacement parts and accessories may be purchased at a store near you or on our website www.philips.com/store.
The following accessories are available:
- SH71 Philips Norelco replacement shaving heads (for S693 only)
- SH93 Philips Norelco replacement shaving heads (for S791, S793 and S794 only)
For assistance, visit our website: www.philips.com/support or call toll free 1-888-744-5477.
- This product contains a rechargeable lithium-ion battery which must be disposed of properly.
- Contact your local town or city officials for battery disposal information. You can also call 1-800-822-8837 or visit www.call2recycle.org for battery drop-off locations.
- For assistance, visit our website www.philips.com/support or call 1-888-744-5477 toll-free.
- Your product is designed and manufactured with high quality materials and components, which can be recycled and reused. For recycling information, please contact your local waste management facilities or visit: www.recycle.philips.com.
This device complies with part 15 of the FCC Rules. Operation is subject to the following two conditions:
- This device may not cause harmful interference, and
- This device must accept any interference received, including interference that may cause undesired operation.
This equipment has been tested and found to comply with the limits for a Class B digital device, pursuant to part 15 of the FCC Rules. These limits are designed to provide reasonable protection against harmful interference in a residential installation. This equipment generates, uses and can radiate radio frequency energy and, if not installed and used in accordance with the instructions, may cause harmful interference to radio communications. However, there is no guarantee that interference will not occur in a particular installation. If this equipment does cause harmful interference to radio or television reception, which can be determined by turning the equipment off and on, the user is encouraged to try to correct the interference by one or more of the following measures:
- Reorient or relocate the receiving antenna.
- Increase the separation between the equipment and receiver.
- Connect the equipment into an outlet on a circuit different from that to which the receiver is connected.
- Consult the dealer or an experienced radio/TV technician for help.